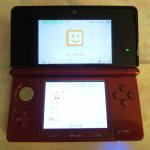
Hello, after the profile post I made recently, it's time to restore another 3DS again! This time it's a red original 3DS, Japanese region version:
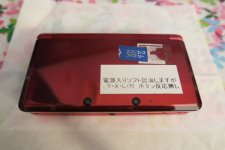
The sticker on it might already give you a bit of a hint about one of the things that needs fixing, if you know a thing or two about 3DS systems.
The story of it that I know at least, is that the previous owner tried to replace the bottom screen (display) because it had visible water damage, but then gave up halfway through in the mess of cables, and just sold it as is, quite literally in pieces. The new replacement bottom display was already in there though. The other faults:
- touch screen is very used and cannot be calibrated correctly
- L and R buttons are both not responsive, although you'll see the cause of half of that problem in a moment
- 'A' button requires a lot of pressure to register, much worse than in the previous repair of my own o3DS.
Now you could say "let's open it up" or something like that, but no point, as I said it was already in pieces, and some screws were missing too, I never bothered to screw the back cover back on until I was going to get around to repairing the thing.
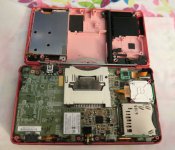
Aaand, a snapped cable, from the failed repair:
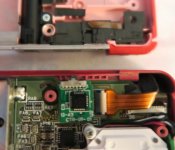
But the other shoulder button which had an undamaged cable also didn't work at all, so I don't think there's any loss here, I probably would have had to replace both anyway, and I don't think anyone sells the L or R button cables separately.
Very easy process, no point even showing it, both buttons work just fine after replacing the cables.
Next, the touchscreen, after getting it off the actual display, you'll have to get the plastic frame off of it to transfer to the new touch panel:
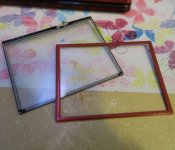
I never did this before so I expected it to be a bit hard, but fortunately it was easy enough to take off. And of course, the satisfying peel from the brand new, clean and spotless touch panel:
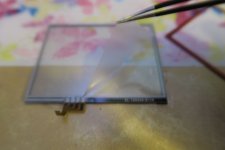
Putting the frame back on was also easy enough, just sticks back with the glue that was on it. Then, sticking the touch panel and the display back together again, it can be a bit of a tedious process to get it without any dust particles between them, but at least you get as many tries as you need, unlike with screen protectors.
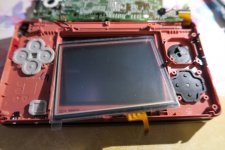
Preferred to do it like this to get the display correctly in place, fresh glue from the fresh touch panel on the other side works well too. So, that part is fixed now, and really entirely new at this point, looks and works great.
Next, the button issue, I really fear that this is becoming a common issue with the original 3DS, since I had the same issue on my own unit that I often use, although it wasn't as bad and unusable on there. I got a replacement button pad for it, although for different 3DS models, I already knew that it wouldn't match in the size and spacing, but I expected to just cut off and replace only one of the "buttons".
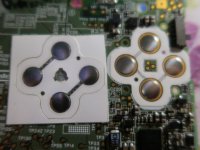
So I started peeling off...
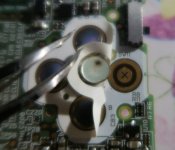
Well, THAT might be the culprit! Maybe I won't have to replace it at all then, looks like something I could clean off with alcohol.
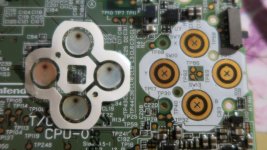
Looks like that's on all of the buttons as well, hmmm... Well, I gave all four a good clean with alcohol, and then tried to stick it back in place, it was a bit hard since the alcohol ate a bit of the glue away. I assembled the system back enough just to power on and test the buttons, and while the A button now seemed to work great, it seemed like the issue has kind of moved to the Y button...
So I got back to that place, and was about to cut out just the part above the Y button, only to realize after I already made one cut, that I haven't actually rotated the little thing 180 degrees, so it made no sense that the issue went to the Y button. Decided to try cleaning and sticking it back one more time, and after that it seemed much better with no issue on any of the buttons, but I wanted to make sure in some way. How convenient that this is a Japanese region locked 3DS, and I had Japanese Project Mirai cartridges, the best thing for destroying the ABXY buttons again.
Opened that up and got a funny surprise: the birthday on this 3DS was set to 01/01, and the current date was also 01/01, since it obviously couldn't remember the time without the battery constantly inserted. So the game gave me a birthday cake and wanted me to blow out the candles on it, but obviously I didn't have the microphone plugged in, since I was just assembling the thing enough to test the buttons.... Seemed like there was no other way to get past that screen, but thankfully Miku gave up waiting for me after a few minutes. And I can say, the ABXY buttons work perfectly now, even when I made sure to hit the buttons as lightly as possible.
So at this point I just had to put the system back together properly even with the missing screws, and give it the final cleaning, of course there are these dumb stickers:
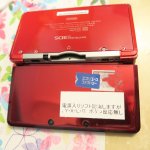
Thankfully, they didn't peel off too badly, but still some disgusting glue residue to take care of:
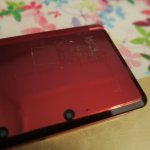
But luckily that was easy enough to clean off as well, just a few minutes of rubbing with alcohol, didn't expect it to be this easy. Looks pretty good now:
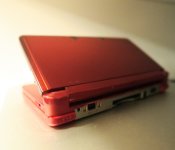
Also, peeling off the old screen protector off the top screen:
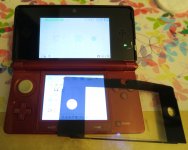
And what do we have after that? Both screens without basically a single scratch mark, and basically no infamous vertical scratches on the top screen at all! Deserved a new pair of screen protectors, regardless of anyone's preference and opinion on them, I think preservation is important at this point of the 3DS's life. Really nice to have a system in such a good condition now. Firmware is also a bit old, so it should be pretty easy to install CFW on with just soundhax if I ever feel like doing it.
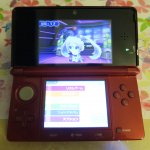
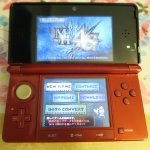
Thanks for reading. For a possible next repair, should I try resoldering motherboard-soldered shoulder buttons, or an entire game card slot?


The sticker on it might already give you a bit of a hint about one of the things that needs fixing, if you know a thing or two about 3DS systems.
The story of it that I know at least, is that the previous owner tried to replace the bottom screen (display) because it had visible water damage, but then gave up halfway through in the mess of cables, and just sold it as is, quite literally in pieces. The new replacement bottom display was already in there though. The other faults:
- touch screen is very used and cannot be calibrated correctly
- L and R buttons are both not responsive, although you'll see the cause of half of that problem in a moment
- 'A' button requires a lot of pressure to register, much worse than in the previous repair of my own o3DS.
Now you could say "let's open it up" or something like that, but no point, as I said it was already in pieces, and some screws were missing too, I never bothered to screw the back cover back on until I was going to get around to repairing the thing.

Aaand, a snapped cable, from the failed repair:

But the other shoulder button which had an undamaged cable also didn't work at all, so I don't think there's any loss here, I probably would have had to replace both anyway, and I don't think anyone sells the L or R button cables separately.
Very easy process, no point even showing it, both buttons work just fine after replacing the cables.
Next, the touchscreen, after getting it off the actual display, you'll have to get the plastic frame off of it to transfer to the new touch panel:

I never did this before so I expected it to be a bit hard, but fortunately it was easy enough to take off. And of course, the satisfying peel from the brand new, clean and spotless touch panel:

Putting the frame back on was also easy enough, just sticks back with the glue that was on it. Then, sticking the touch panel and the display back together again, it can be a bit of a tedious process to get it without any dust particles between them, but at least you get as many tries as you need, unlike with screen protectors.

Preferred to do it like this to get the display correctly in place, fresh glue from the fresh touch panel on the other side works well too. So, that part is fixed now, and really entirely new at this point, looks and works great.
Next, the button issue, I really fear that this is becoming a common issue with the original 3DS, since I had the same issue on my own unit that I often use, although it wasn't as bad and unusable on there. I got a replacement button pad for it, although for different 3DS models, I already knew that it wouldn't match in the size and spacing, but I expected to just cut off and replace only one of the "buttons".

So I started peeling off...

Well, THAT might be the culprit! Maybe I won't have to replace it at all then, looks like something I could clean off with alcohol.

Looks like that's on all of the buttons as well, hmmm... Well, I gave all four a good clean with alcohol, and then tried to stick it back in place, it was a bit hard since the alcohol ate a bit of the glue away. I assembled the system back enough just to power on and test the buttons, and while the A button now seemed to work great, it seemed like the issue has kind of moved to the Y button...
So I got back to that place, and was about to cut out just the part above the Y button, only to realize after I already made one cut, that I haven't actually rotated the little thing 180 degrees, so it made no sense that the issue went to the Y button. Decided to try cleaning and sticking it back one more time, and after that it seemed much better with no issue on any of the buttons, but I wanted to make sure in some way. How convenient that this is a Japanese region locked 3DS, and I had Japanese Project Mirai cartridges, the best thing for destroying the ABXY buttons again.
Opened that up and got a funny surprise: the birthday on this 3DS was set to 01/01, and the current date was also 01/01, since it obviously couldn't remember the time without the battery constantly inserted. So the game gave me a birthday cake and wanted me to blow out the candles on it, but obviously I didn't have the microphone plugged in, since I was just assembling the thing enough to test the buttons.... Seemed like there was no other way to get past that screen, but thankfully Miku gave up waiting for me after a few minutes. And I can say, the ABXY buttons work perfectly now, even when I made sure to hit the buttons as lightly as possible.
So at this point I just had to put the system back together properly even with the missing screws, and give it the final cleaning, of course there are these dumb stickers:

Thankfully, they didn't peel off too badly, but still some disgusting glue residue to take care of:

But luckily that was easy enough to clean off as well, just a few minutes of rubbing with alcohol, didn't expect it to be this easy. Looks pretty good now:

Also, peeling off the old screen protector off the top screen:

And what do we have after that? Both screens without basically a single scratch mark, and basically no infamous vertical scratches on the top screen at all! Deserved a new pair of screen protectors, regardless of anyone's preference and opinion on them, I think preservation is important at this point of the 3DS's life. Really nice to have a system in such a good condition now. Firmware is also a bit old, so it should be pretty easy to install CFW on with just soundhax if I ever feel like doing it.


Thanks for reading. For a possible next repair, should I try resoldering motherboard-soldered shoulder buttons, or an entire game card slot?
