Beginners guide to setting up.
Wood R4 by the yellow.wood.goblin will give your R4 the look and feel of an Acekard, but at less than half the cost. Game compatibility is very good, over 99% games work clean without the need for patching.
Contents
1. Buying an R4
2. Extracting from Archives.
3. Setting up your MicroSD card.
4. Installing Wood R4
5. Introduction to the Wood R4 Graphical User Interface
6. Putting games onto your MicroSD card.
7. Favorites
8. Saves
9. Cheats.
10. Soft Reset.
11. Installing Skins.
12. Links[/quote][/quote]
Step 1. Buying an R4
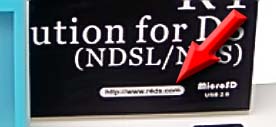
The R4 has been out of production for sometime due to Nintendo filling a lawsuit against the original R4 Team. Because of this almost every R4 you see for sale today is a clone. The problem is that while many call themselve's R4's, many are infact clones of the Acekard, EZVI or DSTT and not the original R4. Officially Wood R4 only works on the Original R4, or 1:1 clones of the original R4. The 1:1 clones are almost impossible to identify, they are to the same specification and use exactly the same components as the original R4. You can identify which clones are of the original R4 from the website address on the R4 packaging:
The clones which work have
http://www.r4ds.com,
http://www.r4ds.me/ or
http://www.r4ds.cn as their website and look like this:
The original R4 and it's clones are limited to using MicroSD cards with a maximum capacity of 2GB, MicroSDHC cards are not supported. If you want to use MicroSDHC cards, you should consider purchasing an Acekard instead. ShopTemp have the
Acekard 2i for $14.95 delivered, and
Acekard 2.1 for $12.95. These R4's will also only work on the DS Phat or DS Lite, they will not work on a DSi or DSi XL. There are people such as Xenon++ who are working on getting R4-SDHC cards to work with Wood R4, their thread is
Here. The thread for WAIO is
here which is the Wood GUI adapted to work on other carts. I will not be covering WAIO in this guide, it doesn't interest me.
Currently the best place to purchase an R4 from is
ShopTemp. They guarentee the R4 they supply will be compatible with Wood R4. It also comes with a MicroSD card reader, carry case and a strap. This can be delivered to your door for just $6.00, which is less than the price of almost any DS game.

 Step 2. Extracting from Archives.
Most DS games/ software along with Wood R4 are compressed into a single file to reduce their size and to make it easier to transfer over the internet. These files will normally have the .7z/ .rar/ .zip file extensions. You will need to install an application to uncompress these files, you can use
7zip 
or
WinRar 
.
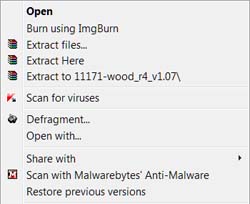
Once installed both should give you a new 'context' menu. Right clicking on an archive (.7z/ .rar/ .zip) will give you to the options, "Extract Here", "Extract files..." and "Extract to Directory [archive name].
Select the archive you wish to extract, then right click, and select Extract Files. Select the destination to extract to and click ok. You can select multiple archives by holding down the Ctrl key on your keyboard and left clicking on the archives.
- 'Directory': This is another term for Folder.
- 'Root directory': This is what you will see if you double click on your MicroSD card in Windows Explorer. The root directory is just a single \ and is the first directory on the card. For example if your MicroSD card is 'F:' it's root directory is 'F:\'
Step 3. Setting up your MicroSD card.
Most computer operating systems don't format MicroSD cards to the SD Card Association's standards, this can cause problems later on. To avoid this problem, use the official SD Association Formatter which can be downloaded from
Here. You won't be able to select the block size or file system, as the SD formatter automatically selects those based on your MicroSD card and the SD Card Association's standards.
- This was previously known as the Panasonic SD Formatter, but has now been adopted by the SD Card Association as their own
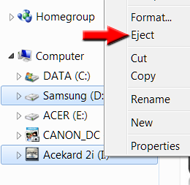
When you want to remove your MicroSD card from your computer, it's important you goto '
My Computer', right click on your MicroSD card and select '
Eject'. This can prevent data corruption.
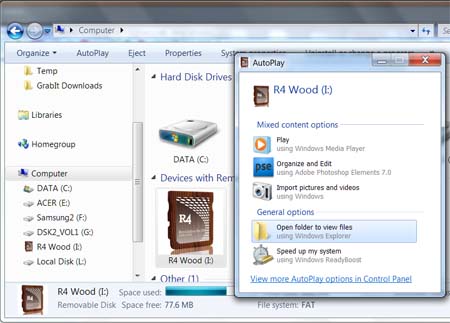
You can give your MicroSD card a custom Wood R4 icon when inserted into a PC, this allows you to easily identify your R4's MicroSD card. This is optional and isn't required to use your R4.
To download click on each image, and extract the downloaded archive to the root directory on your MicroSD card.
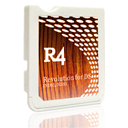
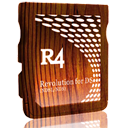
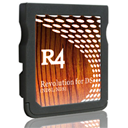
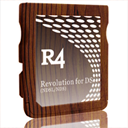
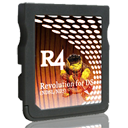
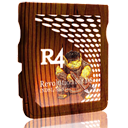
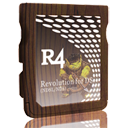
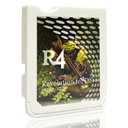

You can change the MicroSD drive name by opening autorun.inf and editing "Wood R4" on the second line.
Icons for other flashcarts can be found in
This thread
along with an icon for the original r4 by Twiz.
Step 4. Installing Wood R4
You can setup Wood R4 to be your R4's main OSMenu, or if you already have your R4 setup with the R4 official OSMenu/ YSMENU you can setup Wood R4 as a secondary OSMenu.
- OSMenu: This is your R4's Operating system, and is stored on the MicroSD card. Many people refer to this as firmware, which it isn't.
To install Wood R4 as your main OSMenu (recommended):
Download the lastest version of Wood R4 from
Here (which is currently 1.15). Extract this to a folder, once extracted double left-click on this folder. You should now see a folder called "Wood R4 v1.15", double left-click on "Wood R4 v1.15". You should now see a folder named _rpg, a file called _DS_MENU.DAT and two text files: changelog.txt and readme.for.r4.users.txt. The two text files contain information revelant to this release, you should consider reading them before installing although it isn't necessary. Select _DS_MENU.DAT + __rpg and copy them to the root directory of your MicroSD card.
Your MicroSD card should now look like:
The file _DS_MENU.DAT is Wood R4, and __RPG contains files used by Wood R4, so don't delete them. The autorun.inf and icon file will be only be present if you installed an icon as above.
If you have 'Auto Mode' enabled in your DS's system menu, your DS will automatically load Wood R4 when powered on if the R4 is inserted. You will however still get the Health and Safety screen on power up, but you won't need to press (A) or tap the screen when it appears.
You can hide the __rpg folder so it's won't appear in Wood. To do this right click on __rpg, select
properties, put a tick in the
hidden box and click ok.
If you later want to view the __rpg folder to add skins or cheats databases, you can do this put adding __rpg to the Micro SD driver letter address in Windows Explorer
 Unless you want to install Wood R4 as a secondary OSMenu, go to Step 5.
To install Wood R4 as a secondary OSMenu:
If you already have your R4 setup with another Operating Software, you can setup Wood R4 up as a secondary operating software. Wood R4 will peacefully coexist with both the Official R4 software and YSMenu on the same MicroSD card, you can download the last version of the official R4 software (v1.18) from
Here. To set Wood R4 up as a secondary operating software, create a directory called WoodR4 and extract the downloaded Wood R4 archive to this directory. Download and extract
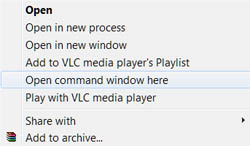
R4CRYPT to this same directory. Now Copy R4CRYPT.EXE into the wood_r4_v1.XX directory. Hold down shift key and right click on the wood_r4_v1.XX directory and select "Open command window here".
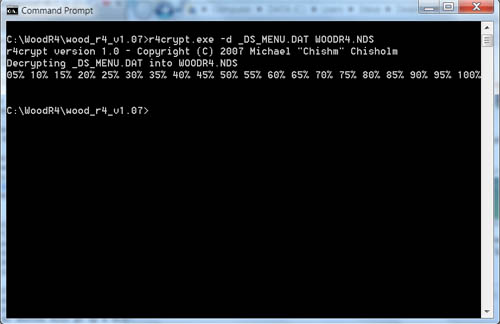
In the black box that pops up type "r4crypt.exe -d _DS_MENU.DAT WOODR4.NDS" and press enter.
Enter the wood_r4_v1.XX directory, delete _DS_MENU.DAT and r4crypt.exe, now copy the entire contents of the directory to your MicroSD card.
Alternatively a premade Wood R4 v1.15 as secondary Operating Software can be downloaded from
Here or
Here
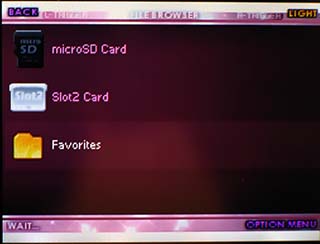
Step 5. Introduction to the Wood R4 Graphical User Interface
- The (Up) button will select the ROM or Folder above.
- The (Down) button will select the ROM or Folder below.
- The (Right) button will select the page of ROMs/ Folders to the right.
- The (Left) button will select the page of ROMs/ Folders to the left.
- The (Y) button will bring up the properties for the selected file or Folder.
- The (A) button will load a game, open a folder, or confirm within dialog boxes.
- The (X) button will go to the favorites folder.
- The (B) button will go up a directory, or Cancel within dialog boxes.
- The (L. Trigger) functions as Shiftbutton while in the file browser or use to navigate through settings pages.
- Shift + (Select) Will display all files within the file browser. Press again to go back to the previous setting.
- Shift + (Y) Will display Settings. This is the same as selecting Settings from the Start Menu
- Shift + (X) Will display Cheats. This is the same as selecting a ROM, Pressing (Y) and pressing (X). This will only work if there are cheats for this game in the cheat database you have installed.
- The (R. Trigger) button will change the backlight brightness, or use to navigate through settings pages.
- The (Select) Button will change the file browser listing layout. Modern: Filenames + Icons, 4 displayed per page ]] Internal: ROM name as taken from the ROM header + Icons, 4 displayed per page ]] Old School: Filenames with no icons, 10 displayed per page
- The (Start) button will bring up the Wood R4 Start menu.
'ROM': Read Only Memory. This is the memory inside a retail cartridge, People use ROM to refer to the image dumped from a cartridge.
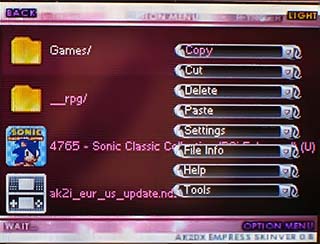
Start Menu
- Copy -] Will copy the highlighted file, you will have to navigate to the destination directory, press start again and then paste to complete the copy operation.
- Cut -] Will move a file, you will have to navigate to the destination directory, press start again and then paste to complete the move operation.
- Delete -] will delete the highlighted file.
- Paste -] Will copy the file previous selected by the copy/ cut option to this folder.
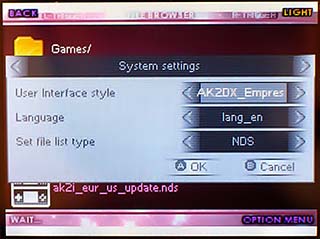
- Settings -] Will show the System settings. The L and R buttons will change which settings page is displayed.
- Help -] Quick button reference, along with the Wood R4 version you are using.
- File Info -] Displays the properties for the hightlighted item. It's the same as selecting a ROM/ folder and pressing (Y).
- Tools -] Allows you to change the 3in1 expansion settings (if installed).
File Information
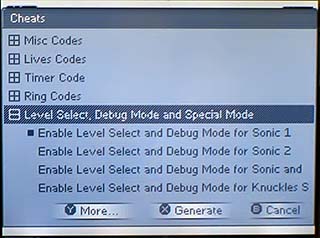
File Information -] Cheats
- A square outlined box indicates a tree list, pressing (A) on the box will expand or collapse the branch.
- Pressing (A) will enable or disable the selected cheat. A small filled square box indicates this cheat is enabled.
- More (Y) -] Display the key combination to activate highlighted cheat.
- Generate (X) -] Create the CC file for the selected cheats.
Settings
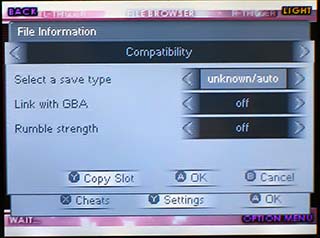
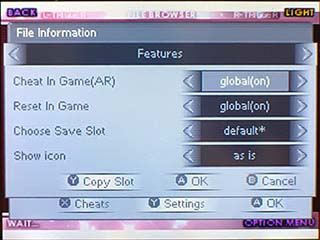
Using the L and R trigger will change which settings page is displayed. Compatibilty ]] Features
File Information ] Settings ] Compatibilty
- Select a save type -] Different games use different size save files. This will allow you to choose the save size for the game, this should normally be set to auto unless you are having issues with a particular games saving.
- Link with GBA -] Used with the 3in1 expansion pack.
- Rumble strength -] Used with the 3in1 expansion pack.
Pressing (Y) will allow you to copy your save to another file. The source save will be whatever save slot is selected under Features.
File Information ] Settings ] Features
- Cheat in Game (AR) -] Enables or Disables cheats only on this game. 'Global' means it will use the setting from the patches menu. AR stands for action replay, which are the same cheat codes R4 Wood uses.
- Reset in Game -] Enables or Disables Soft Reset only on this game. 'Global' means it will use the setting from the patches menu
- Choose Save Slot -] Wood R4 allows you to have upto 4 save files for each game, this selects which one to use. The first (default) will have the nds.sav file extension, the second will have nds.1.sav , the third nds.2.sav and the 4th nds.3.sav
- Show icon -] Control how Wood R4 displays the game icon.
Settings
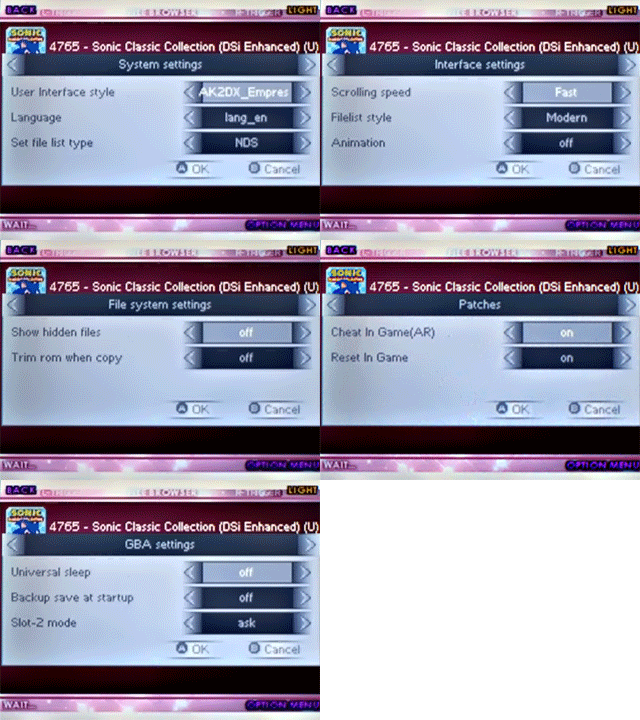
Using the L and R trigger will change which settings page is displayed: System Settings ]] Interface Settings ]] File System Settings ]] Patches ]] GBA settings
Start Menu ] Settings ] System Settings
- User Interface style -] This is your Skin selection.
- Language -] Interface language.
- Set file list type (NDS/NDS+SAV/ALL) -] Control which file types are displayed in Wood R4's file browser.
You can hold down the (select) button and press the (L. Trigger) to quicklly switch between displaying all files, and the setting in 'Set file list type'. For this reason you should have 'Set file list type' set to 'NDS' or 'NDS+SAV'.
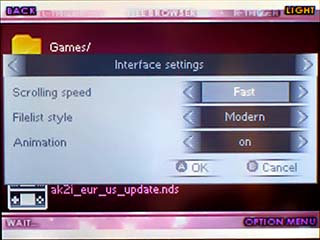
Interface Settings
- Scrolling Speed -] Changes the scrolling speed in Wood R4's File browser.
- Filelist Style -] Will change the file browser listing layout. Modern: Filenames + Icons, 4 displayed per page ]] Internal: ROM name as taken from the ROM header + Icons, 4 displayed per page ]] Old School: Filenames with no icons, 10 displayed per page]] Filenames (10 per page). The is the same as pressing the (select) button while in the file browser.
- Animation -] Changes wether or not the icon of the highlighted file/ folder is animated in the file browser (The icon will shrink/ expand)
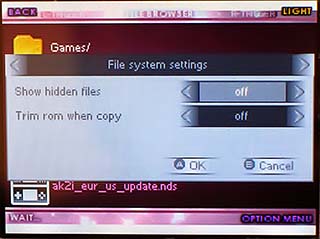
Start Menu ] Settings ] File system settings
- Show hidden files -] Controls wether or not hidden files/ folders are displayed in the file browser. Files can be hidden by inserting the MicroSD card into a PC. From Within windows explorer right click on the file/ folder and select properties, put a tick in the hidden box and select ok.
- Trim rom when copy -] Controls wether or not Wood R4 will trim the padded space from a file when copying/ pasting. It's easier to trim these using a an external application like NDStokyotrim.
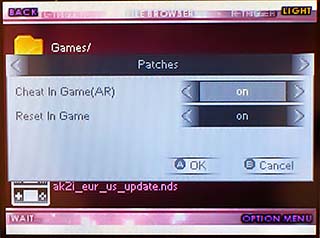
Start Menu ] Settings ] Patches
- Cheat in Game(AR) -] globally enables cheats, AR=Action replay.
- Reset in Game -] globally enables Soft Reset, pressing the (A) + (B) + (L) + (R) + (Down) buttons within a game/ application will take you back to the Wood R4 file browser.
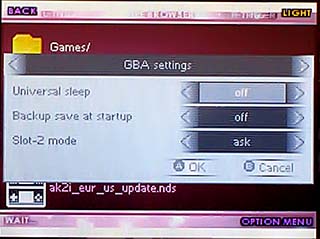
Start Menu ] Settings ] GBA settings
- universal Sleep -] Requires a 3in1 expansion cart.
- Backup save at startup -] Requires a 3in1 expansion cart.
- Slot-2 mode -] Requires a 3in1 expansion cart.
Step 6. Putting games onto your MicroSD card.
Normally you should use clean ROMs, Wood will already include loaders to circumvent any Anti Piracy methods present in all games present before the release of the version you are using. If you use a patched ROM, it will mean this will be applied twice, once by the patch and once by Wood and so may cause problems.
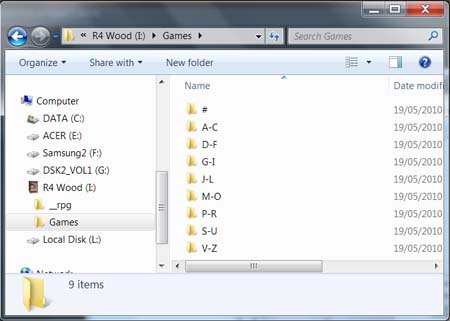
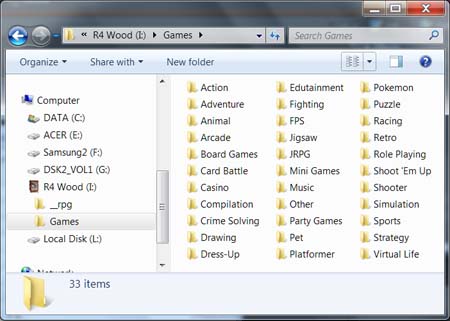
You can copy your nds files to the root directory, or place them in subdirectories. For example you could have a directory for each game genre (Adventure, RPG, racing etc), by alphabetical (A-C,D-F,G-I etc) or just put them all in a 'games' directory.
- You can use This batch file to quickly create alphabetical directories inside a games directory. Download and extract to the root directory of your MicroSD card, then double click on makedir.
- You can use This batch file to quickly create genre directories inside a games directory. Download and extract to the root directory of your MicroSD card, then double click on makedir.
Do not ask for or post links to commercial ROMs on here, you will be banned.
Wood R4 cannot load games from archives, you must place the nds files themselves on the MicroSD card. ROMs can be reduced in size by using trimmer such as
NDSTokyoTrim, these remove the padded space from the ROMs. If you trim a DSi enchanced game, you will end up with a bad ROM so don't do it until the trimming tools have been updated. NDSTokyoTrim will be updated shortly and will no longer suffer from this issue. An alternative trimmer which is also very popular is
TinyTrimmer which you can download
Here
You can use software such as
RToolDS or
Rominator to manage your ROMs and copy them to your MicroSD card, you can also use software such as
NdsCRC or
OfflineList to rename/ repackage your ROMs (into archives).
RtoolDS:
Homebrew should normally be placed in the root directory, as there are one or two that expect that to be their location.
- Homebrew is software people have created at home using flashcarts such as the Acekard and R4. It's normally free to use.
Step 7. Favorites
Wood R4 has a favorites folder in it's root menu. You can place shortcuts to your favorites games within here. You can quickly jump to the favorites folder by pressing the (X) button. To add a game to the favorites folder, highlight your game, press (start) and select 'Copy'. Now press the (X) button, press (Start) and select 'paste'. You game should now appear in the favorites folder. It doesn't copy the ROM, only a shortcut to the ROM.
Step 8. Saves
Wood R4 uses the *.nds.sav file extension for it's save files. The save files need to be located in the same directory and have the same filename as the game ROM they refer to.
Other R4 OSMenu's may use the *.sav file extension instead, the same applies to the OSMenu's of many other carts. If you have saves from these and which to use them with Wood R4, you will have to rename them. You can download a tool
Here which will quickly do that for you. To use download and extract to the root directory of your MicroSD card, then double click on SaveManager and select option 5. It will rename all the saves on the MicroSD card, including those in subdirectories. If you want to rename them back again, you can do so by selecting option 4.
Data on MicroSD cards can often become corrupted, which could cause you to lose all your save files. For this reason it's a good idea to regularly backup your save files. You can do this by using the same tool and selecting option 1, it will copy all your save files to My Documents\DS-Saves\[date]\[time] or option 2 will back them up to a backup directory on your MicroSD card.
Step 9. Cheats.
Before using cheats you will have to install a cheat database, GBAtemp provides an upto date cheat database for you to use.
The NEW massive CHEAT DataBase maintained by
Narin 
,
elixirdream 
and the Cheat Code Crew. Currently it's normally updated 1-2 times per week, so will normally contain the latest cheats, you can find out more by visting the Cheats forum. To install, download
This file and extract to the __RPG/Cheats directory on your MicroSD card.
Cheats can be enabled globally for all games, or just for individual games. To enable cheats globally, from within Wood R4 press (start), select 'Settings', press the (R) button 3 times and next to 'Cheat In Game (AR)' select 'on'. Now Press (A) to confirm.
To enable cheats for an individual game, highlight a game and press (Y) to bring up the properties. Now press (Y) again, press the (R) button, next to 'Cheat in Game (AR)' select 'On', press (A) to confirm the changes. This will override the setting under the patches menu, By default it will be 'Global' which means it will use what ever setting is present in the 'Patches' menu. 'Off' will disable cheats overriding the setting in the 'Patches' menu.
Now you have to select which cheats you want to enable for your game. To do this this highlight your ROM, press the (Y) button to bring up the properties, Now press the (X) button. Press (A) to select the cheats to enable, and when you are done press (X) to confirm.
As of Wood 1.10, a shortcut has been added which allow you to quickly view the cheats for a game. Simply highlight a ROM, hold down (L) and press (Y).
Wood R4 will then save these cheats to a file which has the same filename as the ROM, but with a .CC file extension. The .CC file will be in the same location as the ROM. Most cheats will require a key combination to be pressed for them to activated within the game. To view the key combination select the cheat and press the (Y) button.
Step 10. Soft Reset.
Soft Reset allows you to use a key combination to go back to the Wood R4 file browser from within a game. This saves you having to power off/ on the DS. The Soft Reset button combination is: (L. Trigger)+(R. Trigger) +(B)+(A)+(Down), these need to be pressed at the same time.
This can either be enabled gloablly, or on a per game basis. To enable Soft Reset globally, from within Wood R4 press (start), select 'Settings', press the (R) button 3 times and next to 'Reset in Game' select 'on'. Now Press (A) to confirm.
To enable Soft Reset for an individual game, highlight a game and press (Y) to bring up the properties. Now press (Y) again, press the (R) button, next to 'Reset in Game' select 'On'. This will override the setting under the patches menu, By default it will be 'Global' which means it will use what ever setting is present in the patches menu.'Off' will disable Soft Reset, overriding the setting in the 'patches' menu.
Step 11. Installing Skins.
Skins completely change how Wood R4 looks and feels. Because of it's Acekard background, Wood R4 uses Acekard skins and not R4 skins. You can download skins from places such as
NDSthemes. To install, download and extract the akin archive to the __RPG/UI folder on your MicroSD card. Each skin needs to be in it's own folder. Wood will use the folder name to identify the skin within the Wood interface.
If it's not already done so in your skins archive, The files: clock_colon.bmp, clock_numbers.bmp, day_numbers.bmp, year_numbers.bmp will need to be placed into a folder named "calend
ar" within the skin's folder. Take notice of the spelling of "calend
ar", as it's easily misspelt.
To change your skin from within Wood R4 press (start), goto settings, next to 'User Interface style' select your skin. Now press (A) to confirm the changes.
Sometimes the skins you install may be corrupted or missing required elements which can cause problems. When you select the skin, it may prevent the GUI appearing which means you can't change the skin back. Fortunately this is very easy to fix, to do this insert the MicroSD card into your PC and open the globalsettings.ini file which is located in the __rpg directory on your MicroSD card. Near the top of the file you will find the line:
CODEuiName=XXX
XXX will be the name of skin which Wood is currently set to use, rather than XXX itself. Change this to:
CODEuiName=zelda
Which will change the skin back to the Zelda skin which is one of the skins included in the Wood R4 installation archive.
Step 12. GBA.
Wood R4 natively supports the EZFlash 3-in-1 slot-2 expansion for GBA compatibilty. No other slot-2 GBA devices are natively supported, this includes 3in1+, ewin, Super Card Slot 2 and M3 Perfect. If you have one of these and want support added to Wood R4, you will have to mail the device to the yellow.wood.goblin.
If you have a 3in1+, there is a thread
Here by qwertymodo which is testing a patch which adds native support for the 3in1+ with the intention of getting this added to the main Wood code if it proves to be sucessful.
GBA frames should be supported, each skin will normally include a gbaframe as gbaframe.bmp. If you have a skin which is missing one, you can copy it from another skin. AKAIO also allows you to have a skin for each game, this should also apply to Wood. Place the gbaframe.bmp in the __rpg/frames directory and then rename gbaframe.bmp to the GameID of the game. Next time you load that game, Wood will use this frame overriding any frame present in the skin. To find out the GameID you can use switch the file browser listing layout to
Internal.
12. Links.
R4DS
yellow.wood.goblin, Wood R4 Developer  Another World, Wood R4 Announcer
  Wood 1.15 Download
  Wood 1.14.2 Download
  Wood 1.14 Download
  Wood 1.13 Download
  Wood 1.12 Download
  Wood 1.11 Download
  Wood 1.10 Download
  Wood 1.09 Download
  Wood 1.08 Download
  Wood 1.07 Download
  Wood 1.06 Download
  Wood 1.05 Download
  Wood 1.04 Download
  Wood R4 Source
  Wood R4 Sources Thread
  Wood R4 1.15 thread
  Wood R4 1.14.2 thread
  Wood R4 1.14 thread
  Wood R4 1.13 thread
  Wood R4 1.12 thread
  Wood R4 1.11 thread
  Wood R4 1.10 thread
  Wood R4 1.09 thread
  Wood R4 1.08 thread
  Wood R4 1.07 thread
  Wood R4 1.06 thread
  Wood R4 1.05 thread
  Wood R4 1.04 thread
  Wood R4 FAQ thread
  Wood R4 for clones thread (for clones other than that of the original)
  Wood R4 bugs and compatibility thread
  Wood R4 Language files thread
  Wood R4 Suggestions thread
*request any additions or changes to Wood R4 here.
Wood R4 3in1+ Patch thread  7zip
7zip  WinRar
  SD Formatter
  SD Formatter Manual
  R4CRYPT
  NDSTokyoTrim
  Thread
  TinyTrimmer
  Tiny Trimmer Instruction Thread
  RToolDS
  Rominator Thread
  Database update Thread
  NdsCRC
  OfflineList
  HashTab
  AK Edit 1.2.1 by Dan Taylor
Acekard Skins
NDSthemes
GBA Frame Template
Vague Rant's AKAIO GBA Frame Collection
The NEW massive CHEAT DataBase
 maintained by
Narin  The Temporary NDS Cheat Database
 maintained by
elixirdream  GBAtemp Cheats Forum
Elixirdream's R4CEE guide
Curly's R4CEE Guide
R4CCE (R4 Cheat Code Editor)
R4CCE (R4 Cheat Code Editor) Mirror
Alphabetical games directories batch file
Genre games directories batch file
Wood R4 Save Manager
Wood R4 Save Converter (Linux, Mac OS)


