


i think i managed to make the hex for my Uno R3 using 'make uno'. i flashed it to my board after putting it into DFU mode and plugged it into the switch's USB-C port, but nothing is happening. is it supposed to show up as a controller on the PC? something's wrong and im not sure what.
You are using an out of date browser. It may not display this or other websites correctly.
You should upgrade or use an alternative browser.
You should upgrade or use an alternative browser.
Finally managed to get the printer working, but it looks like the print also ends up with misaligned rows like others have reported. Any suggestions on how to stop this from happening? It seems like it's definitely due to the controller stalling and dropping inputs for a period of time, and it's not fully consistent on when it occurs.

Last edited by Phosphatide,
I'm very familiar with linux and programming (cybersecurity engineer by trade), however have never used arduino's before and decided this should be my first project with them. I'm going to use this with Splatoon 3.
No issues generating a .hex with my image, however, I need someone to noob speak to me on the arduino.
I have an Arduino Uno R3 (ATmega328P) which to my understanding contains the ATmega16U2 USB chip? Regardless, I can't seem to figure out how to upload a .hex to it. I've tried a couple, including flip and "arduino builder". It seems to work (in that it doesn't error out and upload) but nothing happens when plugged into the switch, and I'm not even sure if I uploaded it correctly.
I'll cashapp anyone cappuccino fare if they can help me figure this one out lol.
EDIT: Seems my issue is that flip drivers don't support x64 machines. Guess I'll need to try it the linux way.
EDIT2: ugh. Tried the linux way. sudo apt-get install dfu-programmer doesn't work so I manually downloaded the package online. Went to manually install it, and the dependencies it needs are literally too obsolete to work on Ubuntu 22 (so says the terminal). What an annoying issue to run into
EDIT3: Alright. Setup a virtual box with a 32bit linux install, and was able to flash the hex to my arduino no problem. Plugged it into my switch and it moved the cursor to the top left corner, changed the brush to medium, and that was it lol. At least now my issue is compiling the hex and not the arduino.
EDIT4: Got it working! Ended up just compiling everything on linux and it worked swimmingly *pun intended*. Gonna go buy myself a cappuccino now lol.
EDIT5: Seems a line or two will get shifted over a few pixels. Not a huge deal, pretty simple to hand fix, but I wonder what causes that.
Attachments

Last edited by Ghawblin,


Hello everyone
A friend of mine gave me his old Teensy ++ 2.0 board so i decided to try this
But, every guide i followed, including the one in this thread, did not work
tried different threads too, different githubs, even virtual machines with ubuntu but nothing ( i am on Windows 10 Home )
Always ended up with errors no matter how many times i tried or started over
The only guide that worked for me is this one:
Followed step x step and it worked 100% for Splatoon 2
So if you have a teensy and are having problems try to start from 0 using that guide
If i try this method on Splatoon 3 however, it works, but the drawing is completely messed up
it draws only the top right side of the picture and it looks like it always skips a line of pixels
I saw on different githubs in the issues comments that a solution is :
" You can workaround it for now by removing the -DZIG_ZAG_PRINTING in makefile and replacing "SWITCH_MINUS" with "SWITCH_LCLICK" in Joystick.c "
However inside the makefile and Joystick.c from the guide i used i can't find those lines, must be totally different
So anyone knows what to change for the instructables guide to work in Splatoon 3?
Thanks in advance
A friend of mine gave me his old Teensy ++ 2.0 board so i decided to try this
But, every guide i followed, including the one in this thread, did not work
tried different threads too, different githubs, even virtual machines with ubuntu but nothing ( i am on Windows 10 Home )
Always ended up with errors no matter how many times i tried or started over
The only guide that worked for me is this one:
Code:
https://www.instructables.com/How-to-Use-a-Teensy-to-Print-Pictures-on-Splatoon-/Followed step x step and it worked 100% for Splatoon 2
So if you have a teensy and are having problems try to start from 0 using that guide
If i try this method on Splatoon 3 however, it works, but the drawing is completely messed up
it draws only the top right side of the picture and it looks like it always skips a line of pixels
I saw on different githubs in the issues comments that a solution is :
" You can workaround it for now by removing the -DZIG_ZAG_PRINTING in makefile and replacing "SWITCH_MINUS" with "SWITCH_LCLICK" in Joystick.c "
However inside the makefile and Joystick.c from the guide i used i can't find those lines, must be totally different
So anyone knows what to change for the instructables guide to work in Splatoon 3?
Thanks in advance
Last edited by EvilBakura,
Its really annoying, I like making pixel perfect art and it botches it up pretty bad the more detail it has, wondering if its a timing issue, can we slow down the script some how?Finally managed to get the printer working, but it looks like the print also ends up with misaligned rows like others have reported. Any suggestions on how to stop this from happening? It seems like it's definitely due to the controller stalling and dropping inputs for a period of time, and it's not fully consistent on when it occurs.
View attachment 329691
Its really annoying, I like making pixel perfect art and it botches it up pretty bad the more detail it has, wondering if its a timing issue, can we slow down the script some how?
Probably just a sleep command lol.
Code:
_delay_ms(250);Something like that would make it sleep for a quarter second.
Code:
Here's the code for the actual drawing process
Code:
    if (state != SYNC_CONTROLLER && state != SYNC_POSITION)
        if (pgm_read_byte(&(image_data[(xpos / 8) + (ypos * 40)])) & 1 << (xpos % 8))
            ReportData->Button |= SWITCH_A;
Plain text my guess is
"If the state of the program is not synching the controller or synching position, then
if you read the PNG and find black pixels at (math for position), then
press A"
That math looks wonky and I'm trying to figure out why we're diving the cursor X position by 8 and multiplying the Y position by 40. I bet the issue isn't timing, but that math. The latter part of that statement is checking if the X position (divided by 8) is greater than 1. Considering that the first pixel of the image (top right corner) is (0,0), I bet the code can't handle zero values and is having to add one (1,1 being the starting pixel; 121,321 being the last) and I bet it's wonkyness surrounding that.
Could stick a delay after it presses A just to see if the issue goes away, if not, I need someone to explain to me this math. Is the raw data the program uses in a different resolution than Splatoon's 120x320 canvas?
Last edited by Ghawblin,
Hello
I found a new method for Splatoon 3 and it works 100%
However you need a different board, a Raspberry Pi Pico
i got one from amazon ( but the guide says you can use any other RP2040 board )
This is the github with the new method:
https://github.com/aveao/splork
The tutorial is based on Linux which i don't have, i have windows, so i used VMware-player + a Xubuntu -22.04.1 iso file and
no problem
I used this image:

Resized it with Gimp to 320 x 120 and converted in only black and white pixels
Exported as a png then followed the tutorial
the final file i got was called splork.uf2 and i simply copied it inside the pi pico
I wanted to try this in docked mode, while using the joycons
since drawing with these boards in portable consumes the battery pretty fast
I went to the drawing screen in splatoon 3, selected the smallest pen and put the cursor at the top left
then i pressed the sync button on the joycons in order to make the sync controller screen appear, connected the pi pico to the usb on the side of the dock and it got recognized
Then i pressed the button on the pi pico board and it started drawing
Took like 25 minutes and this is the result:

I'm gonna try more images later but it seems this method doesn't suffer from the misaligned rows problem like the old method, for now at least
I found a new method for Splatoon 3 and it works 100%
However you need a different board, a Raspberry Pi Pico
i got one from amazon ( but the guide says you can use any other RP2040 board )
This is the github with the new method:
https://github.com/aveao/splork
The tutorial is based on Linux which i don't have, i have windows, so i used VMware-player + a Xubuntu -22.04.1 iso file and
no problem
I used this image:
Resized it with Gimp to 320 x 120 and converted in only black and white pixels
Exported as a png then followed the tutorial
the final file i got was called splork.uf2 and i simply copied it inside the pi pico
I wanted to try this in docked mode, while using the joycons
since drawing with these boards in portable consumes the battery pretty fast
I went to the drawing screen in splatoon 3, selected the smallest pen and put the cursor at the top left
then i pressed the sync button on the joycons in order to make the sync controller screen appear, connected the pi pico to the usb on the side of the dock and it got recognized
Then i pressed the button on the pi pico board and it started drawing
Took like 25 minutes and this is the result:
I'm gonna try more images later but it seems this method doesn't suffer from the misaligned rows problem like the old method, for now at least
As a follow-up note, the misaligned printing is definitely widespread, and seems to be caused by something in the game dropping the controller inputs while the printer is still ticking away. According to some users, the printer worked fine up until the release of version update 1.1.1, and people are keeping an eye out on whether it eventually gets fixed. On the plus side, this has nothing to do with the printer itself possibly malfunctioning; it's just the game. One of the Issues posts in the github page for the code discusses it.
On the topic of trying to fight it with adding delays, I would still recommend sticking a line of "_delay_ms(10)" or so right after the line that determines whether to draw a dot or not. I noticed that sometimes the movement speed desyncs with the dot drawing, so you get extra spots depending on how your connected device is feeling. The minor delay ensures that the timing of the print is more accurate (aside of the game itself dropping inputs anyway).
On the topic of trying to fight it with adding delays, I would still recommend sticking a line of "_delay_ms(10)" or so right after the line that determines whether to draw a dot or not. I noticed that sometimes the movement speed desyncs with the dot drawing, so you get extra spots depending on how your connected device is feeling. The minor delay ensures that the timing of the print is more accurate (aside of the game itself dropping inputs anyway).
I've never used VMware-player or Xubuntu so this is probably gonna go over my head but the Pi Pico seems easier to come by than a teensy right now, so I'll give it a whirl! I'm also running windows as well.Hello
I found a new method for Splatoon 3 and it works 100%
However you need a different board, a Raspberry Pi Pico
i got one from amazon ( but the guide says you can use any other RP2040 board )
This is the github with the new method:
aveao/splork
The tutorial is based on Linux which i don't have, i have windows, so i used VMware-player + a Xubuntu -22.04.1 iso file and
no problem
I used this image:
Resized it with Gimp to 320 x 120 and converted in only black and white pixels
Exported as a png then followed the tutorial
the final file i got was called splork.uf2 and i simply copied it inside the pi pico
I wanted to try this in docked mode, while using the joycons
since drawing with these boards in portable consumes the battery pretty fast
I went to the drawing screen in splatoon 3, selected the smallest pen and put the cursor at the top left
then i pressed the sync button on the joycons in order to make the sync controller screen appear, connected the pi pico to the usb on the side of the dock and it got recognized
Then i pressed the button on the pi pico board and it started drawing
Took like 25 minutes and this is the result:
I'm gonna try more images later but it seems this method doesn't suffer from the misaligned rows problem like the old method, for now at least
I've never used VMware-player or Xubuntu so this is probably gonna go over my head but the Pi Pico seems easier to come by than a teensy right now, so I'll give it a whirl! I'm also running windows as well.
For me it was not immediate what you had to do to and already have to make this to work, had to figure some things out since i never used ubuntu/xubuntu or linux etc, and im used to step x step guides without too many hassles
so i am going to write exactly what i did from 0 and hopefully it helps:
I tried with VirtualBox first, which seems to be a more popular virtual machine, and i could not make it work
With VMware it worked
I got this version:
https://customerconnect.vmware.com/...up=WKST-PLAYER-1624&productId=1039&rPId=91446
As for Xubuntu i got it from here:
https://xubuntu.org/download/
the 22.04 version
Once xubuntu is installed ( make sure to give it enough disc space and ram usage, otherwise it will be super slow and laggy )
the first step is to go install and update what you need to run those commands in the tutorial
First of all if when xubuntu is installed it says there is a new version available let it download and update it
Then open the terminal, from the top left icon it opens the menu and you can find it there, it is a black icon that looks and works very similar to windows command prompt
and type, one line at a time:
close the terminal then open it again and type
close the terminal then open it again and type
Then i went here:
https://datasheets.raspberrypi.com/pico/getting-started-with-pico.pdf
Followied the points:
2.1. Get the SDK
and
2.2. Install the Toolchain
always by typing in the Terminal, just copy and paste the lines inside those grey boxes, one at a time
Using Xubuntu web browser i choosed the image i wanted to use and went here
https://www.iloveimg.com/resize-image
resizing it to 320 x 120
then i opened the resized image with GIMP, which is already installed inside Xubuntu
You have to click at the top on Image>Mode>Indexed.
In the new window that opens click "Use black and white (1-bit) palette." If the image is not black and white already, change the drop-down menu next to color dithering to "Floyd-Steinberg (normal)" Once done, click convert.
Lastly Click File>Export As...
give it an easy name, like IMAGEX.png so it is easier to type later
I downloaded splork from github and extracted it on the xubuntu desktop
i opened the folder splork-main > imageconverter
then i right clicked and choosed to open a terminal there and then typed
In this passage, it might say you can't to it because you don't have python / pyp3 installed, but it will also tell how to get it so follow what it says
then once done retry with the
pip3 install -Ur requirements.txt
Take the IMAGEX.png file you created earlier and put it inside the imageconverter folder
then right click and open terminal there again and type
a new file will be created called drawing.h
take that file and bring it inside the splork-main > rp2040src folder
Choose to open a terminal there and type, one line at a time:
Once done a new folder will be inside the rp2040src folder, called build
You have to open the build folder and if everything went correctly inside there you will have a file called splork.uf2
That is the file that needs to go inside the Raspberry pi pico
I was not able to connect the raspberry to the virtual machine, and for some reason not even able to transfer files from real machine to virtual, so what i did was, while inside xubuntu:
Open internet browser and go here:
https://easyupload.io/
uploaded the splork.uf2 file there and once done i copied the download link to my real windows browser and downloaded it there
Then while holding down BOOTSEL button on the Raspberry pi pico, plug it onto your computer
the board will be recognized as a normal usb stick, so just copy the splork.uf2 inside there and that's it
I went to the drawing screen in splatoon 3, selected the smallest pen and put the cursor at the top left
then i pressed the sync button on the joycons in order to make the sync controller screen appear, connected the pi pico to the usb on the side of the dock and it got recognized
Then i pressed the button on the pi pico board and it started drawing
With VMware it worked
I got this version:
https://customerconnect.vmware.com/...up=WKST-PLAYER-1624&productId=1039&rPId=91446
As for Xubuntu i got it from here:
https://xubuntu.org/download/
the 22.04 version
Once xubuntu is installed ( make sure to give it enough disc space and ram usage, otherwise it will be super slow and laggy )
the first step is to go install and update what you need to run those commands in the tutorial
First of all if when xubuntu is installed it says there is a new version available let it download and update it
Then open the terminal, from the top left icon it opens the menu and you can find it there, it is a black icon that looks and works very similar to windows command prompt
and type, one line at a time:
Code:
apt update
apt upgrade
close the terminal then open it again and type
Code:
apt install sudoclose the terminal then open it again and type
Code:
sudo apt-get update -qy
sudo apt-get upgrade -qy
Then i went here:
https://datasheets.raspberrypi.com/pico/getting-started-with-pico.pdf
Followied the points:
2.1. Get the SDK
and
2.2. Install the Toolchain
always by typing in the Terminal, just copy and paste the lines inside those grey boxes, one at a time
Using Xubuntu web browser i choosed the image i wanted to use and went here
https://www.iloveimg.com/resize-image
resizing it to 320 x 120
then i opened the resized image with GIMP, which is already installed inside Xubuntu
You have to click at the top on Image>Mode>Indexed.
In the new window that opens click "Use black and white (1-bit) palette." If the image is not black and white already, change the drop-down menu next to color dithering to "Floyd-Steinberg (normal)" Once done, click convert.
Lastly Click File>Export As...
give it an easy name, like IMAGEX.png so it is easier to type later
I downloaded splork from github and extracted it on the xubuntu desktop
i opened the folder splork-main > imageconverter
then i right clicked and choosed to open a terminal there and then typed
Code:
pip3 install -Ur requirements.txtIn this passage, it might say you can't to it because you don't have python / pyp3 installed, but it will also tell how to get it so follow what it says
then once done retry with the
pip3 install -Ur requirements.txt
Take the IMAGEX.png file you created earlier and put it inside the imageconverter folder
then right click and open terminal there again and type
Code:
python3 instructionconverter.py IMAGEX.pnga new file will be created called drawing.h
take that file and bring it inside the splork-main > rp2040src folder
Choose to open a terminal there and type, one line at a time:
Code:
mkdir build

cd build


The next line you have to change a bit by typing the username you choose:


export PICO_SDK_PATH=/home/THE USERNAME YOU CHOOSE WHEN YOU INSTALLED XUBUNTU/pico/pico-sdk


So in my case it was

export PICO_SDK_PATH=/home/franky/pico/pico-sdk

then:

cmake ..

make
Once done a new folder will be inside the rp2040src folder, called build
You have to open the build folder and if everything went correctly inside there you will have a file called splork.uf2
That is the file that needs to go inside the Raspberry pi pico
I was not able to connect the raspberry to the virtual machine, and for some reason not even able to transfer files from real machine to virtual, so what i did was, while inside xubuntu:
Open internet browser and go here:
https://easyupload.io/
uploaded the splork.uf2 file there and once done i copied the download link to my real windows browser and downloaded it there
Then while holding down BOOTSEL button on the Raspberry pi pico, plug it onto your computer
the board will be recognized as a normal usb stick, so just copy the splork.uf2 inside there and that's it
I went to the drawing screen in splatoon 3, selected the smallest pen and put the cursor at the top left
then i pressed the sync button on the joycons in order to make the sync controller screen appear, connected the pi pico to the usb on the side of the dock and it got recognized
Then i pressed the button on the pi pico board and it started drawing
Last edited by EvilBakura,
For me it was not immediate what you had to do to and already have to make this to work, had to figure some things out since i never used ubuntu/xubuntu or linux etc, and im used to step x step guides without too many hassles
so i am going to write exactly what i did from 0 and hopefully it helps:
I tried with VirtualBox first, which seems to be a more popular virtual machine, and i could not make it work
With VMware it worked
I got this version:
As for Xubuntu i got it from here:
the 22.04 version
Once xubuntu is installed ( make sure to give it enough disc space and ram usage, otherwise it will be super slow and laggy )
the first step is to go install and update what you need to run those commands in the tutorial
First of all if when xubuntu is installed it says there is a new version available let it download and update it
Then open the terminal, from the top left icon it opens the menu and you can find it there, it is a black icon that looks and works very similar to windows command prompt
and type, one line at a time:
Code:apt update apt upgrade
close the terminal then open it again and type
Code:apt install sudo
close the terminal then open it again and type
Code:sudo apt-get update -qy sudo apt-get upgrade -qy
Then i went here:
Followied the points:
2.1. Get the SDK
and
2.2. Install the Toolchain
always by typing in the Terminal, just copy and paste the lines inside those grey boxes, one at a time
Using Xubuntu web browser i choosed the image i wanted to use and went here
resizing it to 320 x 120
then i opened the resized image with GIMP, which is already installed inside Xubuntu
You have to click at the top on Image>Mode>Indexed.
In the new window that opens click "Use black and white (1-bit) palette." If the image is not black and white already, change the drop-down menu next to color dithering to "Floyd-Steinberg (normal)" Once done, click convert.
Lastly Click File>Export As...
give it an easy name, like IMAGEX.png so it is easier to type later
I downloaded splork from github and extracted it on the xubuntu desktop
i opened the folder splork-main > imageconverter
then i right clicked and choosed to open a terminal there and then typed
Code:pip3 install -Ur requirements.txt
In this passage, it might say you can't to it because you don't have python / pyp3 installed, but it will also tell how to get it so follow what it says
then once done retry with the
pip3 install -Ur requirements.txt
Take the IMAGEX.png file you created earlier and put it inside the imageconverter folder
then right click and open terminal there again and type
Code:python3 instructionconverter.py IMAGEX.png
a new file will be created called drawing.h
take that file and bring it inside the splork-main > rp2040src folder
Choose to open a terminal there and type, one line at a time:
Code:mkdir build cd build The next line you have to change a bit by typing the username you choose: export PICO_SDK_PATH=/home/THE USERNAME YOU CHOOSE WHEN YOU INSTALLED XUBUNTU/pico/pico-sdk So in my case it was export PICO_SDK_PATH=/home/franky/pico/pico-sdk then: cmake .. make
Once done a new folder will be inside the rp2040src folder, called build
You have to open the build folder and if everything went correctly inside there you will have a file called splork.uf2
That is the file that needs to go inside the Raspberry pi pico
I was not able to connect the raspberry to the virtual machine, and for some reason not even able to transfer files from real machine to virtual, so what i did was, while inside xubuntu:
Open internet browser and go here:
uploaded the splork.uf2 file there and once done i copied the download link to my real windows browser and downloaded it there
Then while holding down BOOTSEL button on the Raspberry pi pico, plug it onto your computer
the board will be recognized as a normal usb stick, so just copy the splork.uf2 inside there and that's it
I went to the drawing screen in splatoon 3, selected the smallest pen and put the cursor at the top left
then i pressed the sync button on the joycons in order to make the sync controller screen appear, connected the pi pico to the usb on the side of the dock and it got recognized
Then i pressed the button on the pi pico board and it started drawing
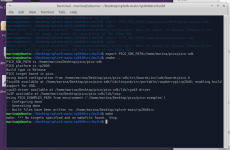
TYSM for such a detailed reply!! I'm verrry close to getting it I think. Literally the last terminal I have to open but for some reason keeps saying my directory doesn't contain CMakeLists.txt even though I'm looking right at it. When I switch things around I get
CMake Error at CMakeLists.txt:8 (include): include could not find load file:
pico_sdk_init.cmake
So I'll have to look at my folders with fresh eyes
Attachments
Last edited by strawberrypyro,
TYSM for such a detailed reply!! I'm verrry close to getting it I think. Literally the last terminal I have to open but for some reason keeps saying my directory doesn't contain CMakeLists.txt even though I'm looking right at it. When I switch things around I get
CMake Error at CMakeLists.txt:8 (include): include could not find load file:
pico_sdk_init.cmake
So I'll have to look at my folders with fresh eyes
That's strange
I'll look into my folders later and I'll let you know
Thanks! I fumbled around with it and ended up getting farther than last but when I do the 'make' command it says no makefile found. The build files are written in the rp2040src folder, not the build one for some reason. So I thought maybe to open the terminal in the rp2040src but then the make file gives me a long list of errors.That's strange
I'll look into my folders later and I'll let you know
Not sure if you can assist any more than what you have but, maybe the pictures add some context?
Attachments
TYSM for such a detailed reply!! I'm verrry close to getting it I think. Literally the last terminal I have to open but for some reason keeps saying my directory doesn't contain CMakeLists.txt even though I'm looking right at it. When I switch things around I get
CMake Error at CMakeLists.txt:8 (include): include could not find load file:
pico_sdk_init.cmake
So I'll have to look at my folders with fresh eyes
Ok i think i know why that happens
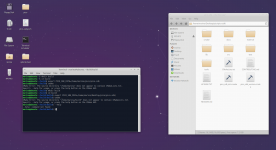
Based on your screenshot i see you have the pico folder on your desktop
it should not be there, put it inside the home folder
like mine:
Then try again
Is Splork also in your home folder?Ok i think i know why that happens
Based on your screenshot i see you have the pico folder on your desktop
it should not be there, put it inside the home folder
like mine:
View attachment 334440
Then try again
No, my splork-main is on the desktop, i have everything like this:Is Splork also in your home folder?
(ignore the 3 folders at the bottom those are for something else)
No, my splork-main is on the desktop, i have everything like this:
(ignore the 3 folders at the bottom those are for something else)
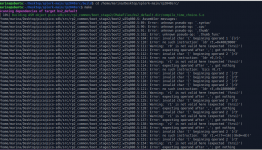
The folders are in the right spots, but the above quote with images is where I'm stuck at nowThanks! I fumbled around with it and ended up getting farther than last but when I do the 'make' command it says no makefile found. The build files are written in the rp2040src folder, not the build one for some reason. So I thought maybe to open the terminal in the rp2040src but then the make file gives me a long list of errors.
Not sure if you can assist any more than what you have but, maybe the pictures add some context?
So you are able to create the drawing.h file but can't make the splork file right?The folders are in the right spots, but the above quote with images is where I'm stuck at now
Try to delete the build folder from your rp2040src folder, so you can start again and it does not make like a conflict, i delete that folder too everytime i make a new image
So, when you put the drawing.h file inside the rp2040src folder, then you right click inside that folder and choose to open a terminal there, this is what you write corret?
Code:
mkdir build

cd build

export PICO_SDK_PATH=/home/marina/pico/pico-sdk

cmake ..

makeNope! I have the drawing.h file, but after I've doneSo you are able to create the drawing.h file but can't make the splork file right?
Try to delete the build folder from your rp2040src folder, so you can start again and it does not make like a conflict, i delete that folder too everytime i make a new image
So, when you put the drawing.h file inside the rp2040src folder, then you right click inside that folder and choose to open a terminal there, this is what you write corret?
Code:mkdir build cd build export PICO_SDK_PATH=/home/marina/pico/pico-sdk cmake .. make
mkdir build
cd build
export PICO_SDK_PATH=/home/marina/pico/pico-sdk
cmake ..
I can't do the final 'make' to get the splork.uf2
Says:
Code:
marina@ubuntu:~/Desktop/splork-main/rp2040src/build$ make
make: *** No targets specified and no makefile found. Stop.I see, well that's strangeNope! I have the drawing.h file, but after I've done
mkdir build
cd build
export PICO_SDK_PATH=/home/marina/pico/pico-sdk
cmake ..
I can't do the final 'make' to get the splork.uf2
Says:
Code:marina@ubuntu:~/Desktop/splork-main/rp2040src/build$ make make: *** No targets specified and no makefile found. Stop.
 i never had that error and i do the same passages
 I don't know if it will help, but deleting everything and starting from zero? Maybe one installation went wrong?
Anyway, do you have a hacked switch with atmosphere?
Because if you do, there is another method to draw now, this:
https://gbatemp.net/threads/shiverbot-splatoon-3-memory-editor-using-sys-botbase.620129/
That program connects directly to your switch, you put the PNG in the program and it draws for you
If you use it only for drawing it's safe, just don't edit other stuff like money or abilities, people are getting console banned ( myself included lol
 )
)Similar threads
-
- Article
- Replies
- 3
- Views
- 2K
- Replies
- 15
- Views
- 12K
- Replies
- 1
- Views
- 2K
-
- Article
- Replies
- 49
- Views
- 30K
- Replies
- 6
- Views
- 4K
Site & Scene News
New Hot Discussed
-
-
28K views
Atmosphere CFW for Switch updated to pre-release version 1.7.0, adds support for firmware 18.0.0
After a couple days of Nintendo releasing their 18.0.0 firmware update, @SciresM releases a brand new update to his Atmosphere NX custom firmware for the Nintendo...by ShadowOne333 107 -
21K views
Wii U and 3DS online services shutting down today, but Pretendo is here to save the day
Today, April 8th, 2024, at 4PM PT, marks the day in which Nintendo permanently ends support for both the 3DS and the Wii U online services, which include co-op play...by ShadowOne333 179 -
17K views
GBAtemp Exclusive Introducing tempBOT AI - your new virtual GBAtemp companion and aide (April Fools)
Hello, GBAtemp members! After a prolonged absence, I am delighted to announce my return and upgraded form to you today... Introducing tempBOT AI 🤖 As the embodiment... -
14K views
The first retro emulator hits Apple's App Store, but you should probably avoid it
With Apple having recently updated their guidelines for the App Store, iOS users have been left to speculate on specific wording and whether retro emulators as we... -
14K views
Delta emulator now available on the App Store for iOS
The time has finally come, and after many, many years (if not decades) of Apple users having to side load emulator apps into their iOS devices through unofficial...by ShadowOne333 96 -
13K views
MisterFPGA has been updated to include an official release for its Nintendo 64 core
The highly popular and accurate FPGA hardware, MisterFGPA, has received today a brand new update with a long-awaited feature, or rather, a new core for hardcore...by ShadowOne333 54 -
13K views
Nintendo Switch firmware update 18.0.1 has been released
A new Nintendo Switch firmware update is here. System software version 18.0.1 has been released. This update offers the typical stability features as all other... -
11K views
"TMNT: The Hyperstone Heist" for the SEGA Genesis / Mega Drive gets a brand new DX romhack with new features
The romhacking community is always a source for new ways to play retro games, from completely new levels or stages, characters, quality of life improvements, to flat...by ShadowOne333 36 -
9K views
"Sonic 3" movie has wrapped production & Knuckles series gets its official poster
Quite a bit of news have unfolded in the past couple of days in regards to the Sonic franchise, for both its small and big screens outings. To start off, the...by ShadowOne333 27 -
9K views
Nintendo takes down Gmod content from Steam's Workshop
Nintendo might just as well be a law firm more than a videogame company at this point in time, since they have yet again issued their now almost trademarked usual...by ShadowOne333 113
-
-
-
179 replies
Wii U and 3DS online services shutting down today, but Pretendo is here to save the day
Today, April 8th, 2024, at 4PM PT, marks the day in which Nintendo permanently ends support for both the 3DS and the Wii U online services, which include co-op play...by ShadowOne333 -
169 replies
GBAtemp Exclusive Introducing tempBOT AI - your new virtual GBAtemp companion and aide (April Fools)
Hello, GBAtemp members! After a prolonged absence, I am delighted to announce my return and upgraded form to you today... Introducing tempBOT AI 🤖 As the embodiment...by tempBOT -
113 replies
Nintendo takes down Gmod content from Steam's Workshop
Nintendo might just as well be a law firm more than a videogame company at this point in time, since they have yet again issued their now almost trademarked usual...by ShadowOne333 -
107 replies
Atmosphere CFW for Switch updated to pre-release version 1.7.0, adds support for firmware 18.0.0
After a couple days of Nintendo releasing their 18.0.0 firmware update, @SciresM releases a brand new update to his Atmosphere NX custom firmware for the Nintendo...by ShadowOne333 -
97 replies
The first retro emulator hits Apple's App Store, but you should probably avoid it
With Apple having recently updated their guidelines for the App Store, iOS users have been left to speculate on specific wording and whether retro emulators as we...by Scarlet -
96 replies
Delta emulator now available on the App Store for iOS
The time has finally come, and after many, many years (if not decades) of Apple users having to side load emulator apps into their iOS devices through unofficial...by ShadowOne333 -
77 replies
Nintendo Switch firmware update 18.0.1 has been released
A new Nintendo Switch firmware update is here. System software version 18.0.1 has been released. This update offers the typical stability features as all other...by Chary -
55 replies
Nintendo Switch Online adds two more Nintendo 64 titles to its classic library
Two classic titles join the Nintendo Switch Online Expansion Pack game lineup. Available starting April 24th will be the motorcycle racing game Extreme G and another...by Chary -
54 replies
MisterFPGA has been updated to include an official release for its Nintendo 64 core
The highly popular and accurate FPGA hardware, MisterFGPA, has received today a brand new update with a long-awaited feature, or rather, a new core for hardcore...by ShadowOne333 -
53 replies
Nintendo "Indie World" stream announced for April 17th, 2024
Nintendo has recently announced through their social media accounts that a new Indie World stream will be airing tomorrow, scheduled for April 17th, 2024 at 7 a.m. PT...by ShadowOne333
-
Popular threads in this forum
General chit-chat
- No one is chatting at the moment.
-
-
-
-
-
-
-
-
-
-
-
-
-
-
-
-
-
-
-
-
-
 @
realtimesave:
@SylverReZ NIntendo pretty much has to release a new console by next year in order to keep making moneys imo+1
@
realtimesave:
@SylverReZ NIntendo pretty much has to release a new console by next year in order to keep making moneys imo+1 -
-
-
@
realtimesave:
they need to have a strong line up on the launch titles too. I think they should move metroid prime 4 to the next console because by now it has been quite a while and there's no release date scheduled yet
-