This entry might be a bit more interesting than the previous one. This time I won't be doing just a standard modchip install, but a mod of my own...
But well, let's start from the beginning. Recently (but before the PSone), I finally bought an imported Japanese Nintendo 64. I wanted one for a long time, not only because the N64 was one of my favorite consoles from a history standpoint, but also because I already got quite a few games for it, all of them being Japanese region versions. Here are those games I already had before getting the N64.

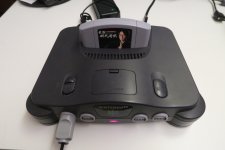
And here's the N64 itself:
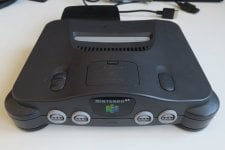
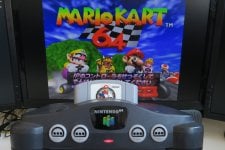
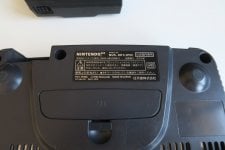
It may not be as cute as the PSone, but it's definitely still a beautiful thing.
Since it's Japanese, it came with a Japanese 100V power supply, and the previous owner included a compatible step-down transformer as well.
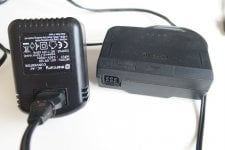
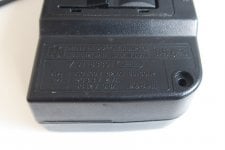
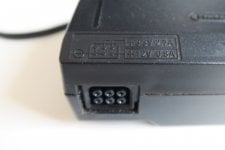
However, this setup is far from ideal, since not only the transformer is extremely bulky, but both the transformer and the power supply heat up a lot even when not in use, so I'm guessing they are quite energy-wasteful as well. That's why I'll be doing a mod on the power supply, it's an idea that came to my mind before I even got the console in my hands. Mod as in modification, but I guess we could also modernization. And just look at that power supply! It literally has the full pinout of the N64 power connector molded directly in the plastic shell. Definitely wouldn't expect this from a Nintendo product today. This thing is just asking to be modded.
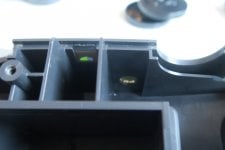
Before we get into the power supply though, let's take a quick look inside the console itself. The previous owner seems to have installed some custom 3D-printed bracket in the cartridge slot. I'm guessing this was done to allow both Japanese and US NTSC games to be played on the console, since apparently the only region-locking between the two NTSC regions was a different cartridge shape.
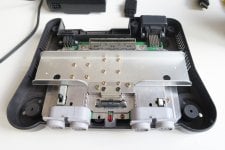
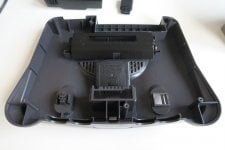
Good chance to give the console a deeper clean too, since it wasn't in the best state when I got it... Also, a bit disappointing how many additional screws there are to get under the heatsinks and RF shield. I was really amazed at how simple the PSone was to take apart. This N64 also needed 6 screws to get to this point, but those were Gamebit screws instead of standard Phillips screws. Although I can't deny that those Gamebit screws feel a lot more durable than most Phillips screws.
I was also hoping that I'd be able to mod the N64 logo on the front to be backlit, but unfortunately it seems impossible to do without significantly destroying the plastic of the shell...
Oh well. Let's get into that power supply now. Two Gamebits and we're in...
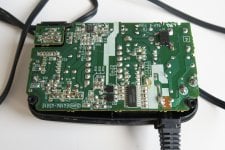
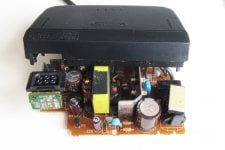
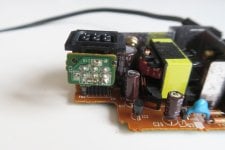
Wow, even the output power connector is on a separate PCB. This thing is really asking to be modded. Looking at that connector board now also answers one question I had in my mind - I was wondering if the presence of two 3.3V pins means that there are two separate 3.3V rails in the power supply. However, it's obvious when looking at the board that there are just three actual pins that are only getting additional support pins in the connector and the cable between the connector and the power supply.
Since I don't plan on restoring the power supply to its original state anytime soon, I just cut off the end of the cable connecting the two PCBs, instead of trying to desolder it in one piece. It'll be easy enough to strip a bit of the end off the rest of that cable anyway, if someone ever needed to reverse this modification. I am still doing what I can to make this modification reversible.
Well, here are the new internals I assembled, back on my dirty soldering bench again:
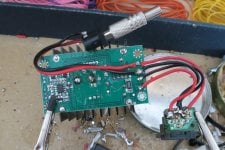
As you can probably guess, I'll just be using a 12V input and a step-down DC to DC converter to get 3.3V. Simple enough, right?
The first tests I did with it, before connecting it to the actual console, were unsuccessful, but it turns out that I just soldered the wires to the DC jack incorrectly. After that, it powered on and all the voltages on the output connector looked fine (of course after adjusting the potentiometers on the step-down module).
Here it is in the shell of the power supply. That DC jack is an absolute perfect fit, I'll once again say that this thing was just asking to be modded.
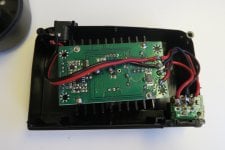
I used a bit of superglue to hold the DC jack in place. I know it's not a great solution to things like this, but I don't really have anything else on hand that would work, and hopefully I used little enough to be fairly easy to remove in the future. I really need to get my hands on some hot-glue gun, since hot-glue is at least a lot easier to remove. For the step-down module, I just used some velcro tape.
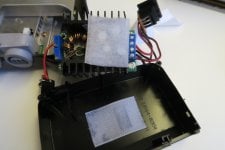
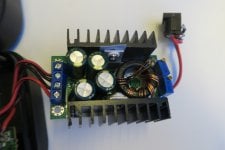
Here's the step-down module I'm using, by the way. It might be a bit overkill for just under 3 amps at 3.3 volts, but better safe than sorry. It's just 5 euro anyway. If I really wanted to save money, I could substitute it for some smaller module in the future.
Time to test it in the actual console:
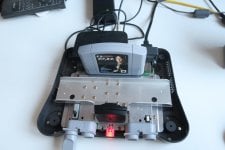
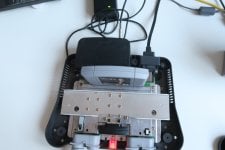
And voila! It works flawlessly, pretty much first try, all games run without any issues. I'm really pleasantly surprised that this mod turned out to be so easy. Again, this thing was really asking to be modded. Of course, since the step-down module already uses quite a bit of space, the actual 12V supply has to be external. While it definitely is a less elegant solution than an original power supply plugged into the native voltage, I am still perfectly happy with this solution, since it's much less bulky and much more efficient than the previous solution. Also, definitely much cheaper than trying to find an European N64 power supply.
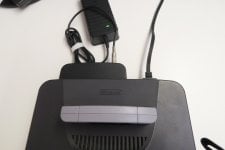
Here's the finished product. Just look at how perfect of a fit that DC jack is. I can now use the N64 with much less hassle, and it's definitely much more energy-efficient too.
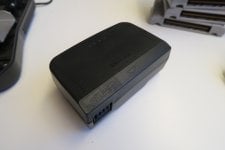
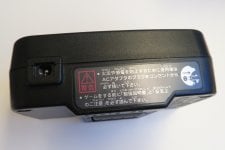
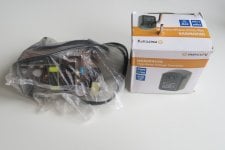
These things won't be needed anymore. No, I won't be throwing the old power supply in the trash, it's just better to store it like that, since the sides of its PCB are basically falling apart into tiny particles, and I'd rather not get other things too dirty.
Well, that's about it for this blog entry. I'm very happy with how my solution turned out, and with how easy it was. I'll say it one last time: this thing was REALLY asking to be modded. Thanks for reading.
Also, since I'm now planning to write more blog entries, what would you like to see next? Audio equipment updates? Flea market tales? Console collection updates? If there's something else you think I can write about, feel free to suggest that in the comments too. DS/3DS repairs will also hopefully be coming back at some point.
But well, let's start from the beginning. Recently (but before the PSone), I finally bought an imported Japanese Nintendo 64. I wanted one for a long time, not only because the N64 was one of my favorite consoles from a history standpoint, but also because I already got quite a few games for it, all of them being Japanese region versions. Here are those games I already had before getting the N64.

And here's the N64 itself:


It may not be as cute as the PSone, but it's definitely still a beautiful thing.
Since it's Japanese, it came with a Japanese 100V power supply, and the previous owner included a compatible step-down transformer as well.


However, this setup is far from ideal, since not only the transformer is extremely bulky, but both the transformer and the power supply heat up a lot even when not in use, so I'm guessing they are quite energy-wasteful as well. That's why I'll be doing a mod on the power supply, it's an idea that came to my mind before I even got the console in my hands. Mod as in modification, but I guess we could also modernization. And just look at that power supply! It literally has the full pinout of the N64 power connector molded directly in the plastic shell. Definitely wouldn't expect this from a Nintendo product today. This thing is just asking to be modded.

Before we get into the power supply though, let's take a quick look inside the console itself. The previous owner seems to have installed some custom 3D-printed bracket in the cartridge slot. I'm guessing this was done to allow both Japanese and US NTSC games to be played on the console, since apparently the only region-locking between the two NTSC regions was a different cartridge shape.


Good chance to give the console a deeper clean too, since it wasn't in the best state when I got it... Also, a bit disappointing how many additional screws there are to get under the heatsinks and RF shield. I was really amazed at how simple the PSone was to take apart. This N64 also needed 6 screws to get to this point, but those were Gamebit screws instead of standard Phillips screws. Although I can't deny that those Gamebit screws feel a lot more durable than most Phillips screws.
I was also hoping that I'd be able to mod the N64 logo on the front to be backlit, but unfortunately it seems impossible to do without significantly destroying the plastic of the shell...

Oh well. Let's get into that power supply now. Two Gamebits and we're in...


Wow, even the output power connector is on a separate PCB. This thing is really asking to be modded. Looking at that connector board now also answers one question I had in my mind - I was wondering if the presence of two 3.3V pins means that there are two separate 3.3V rails in the power supply. However, it's obvious when looking at the board that there are just three actual pins that are only getting additional support pins in the connector and the cable between the connector and the power supply.
Since I don't plan on restoring the power supply to its original state anytime soon, I just cut off the end of the cable connecting the two PCBs, instead of trying to desolder it in one piece. It'll be easy enough to strip a bit of the end off the rest of that cable anyway, if someone ever needed to reverse this modification. I am still doing what I can to make this modification reversible.
Well, here are the new internals I assembled, back on my dirty soldering bench again:

As you can probably guess, I'll just be using a 12V input and a step-down DC to DC converter to get 3.3V. Simple enough, right?
The first tests I did with it, before connecting it to the actual console, were unsuccessful, but it turns out that I just soldered the wires to the DC jack incorrectly. After that, it powered on and all the voltages on the output connector looked fine (of course after adjusting the potentiometers on the step-down module).
Here it is in the shell of the power supply. That DC jack is an absolute perfect fit, I'll once again say that this thing was just asking to be modded.

I used a bit of superglue to hold the DC jack in place. I know it's not a great solution to things like this, but I don't really have anything else on hand that would work, and hopefully I used little enough to be fairly easy to remove in the future. I really need to get my hands on some hot-glue gun, since hot-glue is at least a lot easier to remove. For the step-down module, I just used some velcro tape.


Here's the step-down module I'm using, by the way. It might be a bit overkill for just under 3 amps at 3.3 volts, but better safe than sorry. It's just 5 euro anyway. If I really wanted to save money, I could substitute it for some smaller module in the future.
Time to test it in the actual console:


And voila! It works flawlessly, pretty much first try, all games run without any issues. I'm really pleasantly surprised that this mod turned out to be so easy. Again, this thing was really asking to be modded. Of course, since the step-down module already uses quite a bit of space, the actual 12V supply has to be external. While it definitely is a less elegant solution than an original power supply plugged into the native voltage, I am still perfectly happy with this solution, since it's much less bulky and much more efficient than the previous solution. Also, definitely much cheaper than trying to find an European N64 power supply.
Here's the finished product. Just look at how perfect of a fit that DC jack is. I can now use the N64 with much less hassle, and it's definitely much more energy-efficient too.


These things won't be needed anymore. No, I won't be throwing the old power supply in the trash, it's just better to store it like that, since the sides of its PCB are basically falling apart into tiny particles, and I'd rather not get other things too dirty.

Well, that's about it for this blog entry. I'm very happy with how my solution turned out, and with how easy it was. I'll say it one last time: this thing was REALLY asking to be modded. Thanks for reading.
Also, since I'm now planning to write more blog entries, what would you like to see next? Audio equipment updates? Flea market tales? Console collection updates? If there's something else you think I can write about, feel free to suggest that in the comments too. DS/3DS repairs will also hopefully be coming back at some point.
