Oled Picofly with copper pad DATO point, using the Kamikaze method!

FXDX

Well-Known Member
OP
Member
Joined
Sep 15, 2019
Messages
325
Trophies
0
XP
2,006
Country
Dominican Republic
Picofly Tiny mod to switch Oled, with "Facelift" (copper pad) DATO point, using the Kamikaze method!.
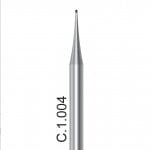
The tool used for drilling is MaAnt D1
I put the mosfet on the back of the motherboard.
I also used a copper pad for the DATO point.
I also put the SDA and SCL wires for a more stable glitch.
Everything went well without any particular problems.
You just need to be careful and be sure of your hand.
 

Attachments

  • 0.JPG
    0.JPG
    1.5 MB · Views: 19
  • 11.JPG
    11.JPG
    1 MB · Views: 20
  • 10.PNG
    10.PNG
    5 MB · Views: 48
  • 9.PNG
    9.PNG
    5 MB · Views: 33
  • 8.PNG
    8.PNG
    5 MB · Views: 55
  • 7.PNG
    7.PNG
    2 MB · Views: 43
  • 6.PNG
    6.PNG
    1.7 MB · Views: 45
  • 5.PNG
    5.PNG
    1.8 MB · Views: 50
  • 4.PNG
    4.PNG
    2.2 MB · Views: 31
  • 3.PNG
    3.PNG
    1.8 MB · Views: 35
  • 2.PNG
    2.PNG
    1.9 MB · Views: 29
  • 1.PNG
    1.PNG
    1.6 MB · Views: 47
  • 7.JPG
    7.JPG
    1.4 MB · Views: 37
  • 12.mp4
    13.6 MB

pyro_astra

New Member
Newbie
Joined
Feb 17, 2024
Messages
2
Trophies
0
Age
25
XP
25
Country
India
which ribbon did you use for the DAT0 point underneath the eMMC?

can you post a picture of it please?
Also can you kindly point to a tutorial for picofly install in OLED without reballing or reworking the emmc?
 

bvang913

Well-Known Member
Newcomer
Joined
Sep 20, 2023
Messages
57
Trophies
0
Age
34
XP
314
Country
United States
which ribbon did you use for the DAT0 point underneath the eMMC?

can you post a picture of it please?
Also can you kindly point to a tutorial for picofly install in OLED without reballing or reworking the emmc?
No flex ribbon was used for the dat0. Kamikaze is a different method instead of using the dat0 adapter.

As far as tutorial, there is a guide and plenty of videos online to do the mod.
 
  • Like
Reactions: FXDX

FXDX

Well-Known Member
OP
Member
Joined
Sep 15, 2019
Messages
325
Trophies
0
XP
2,006
Country
Dominican Republic
Front work but somehow something struck you to pull one wire from the back?
The ''kamikaze'' OLED method by which you expose the DATO alternative point, drilling up to the third layer in the board exactly as you can see in the picture, although it is very risky for an unskilled person, requiring special skills and tools, it is much easier to solder wire to that alternative point than to give down eMMC and then reball or put a DATO adapter. I personally prefer this alternative method.
Post automatically merged:

The ''kamikaze'' OLED method by which you expose the DATO alternative point, drilling up to the third layer in the board exactly as you can see in the picture, although it is very risky for an unskilled person, requiring special skills and tools, it is much easier to solder wire to that alternative point than to give down eMMC and then reball or put a DATO adapter. I personally prefer this alternative method.
 

Attachments

  • WhatsApp Image 2024-02-19 at 10.12.01_849d1187.jpg
    WhatsApp Image 2024-02-19 at 10.12.01_849d1187.jpg
    111.3 KB · Views: 45
  • WhatsApp Image 2024-02-19 at 10.12.03_f2116768.jpg
    WhatsApp Image 2024-02-19 at 10.12.03_f2116768.jpg
    126.4 KB · Views: 26
  • WhatsApp Image 2024-02-19 at 10.12.04_1bc978c5.jpg
    WhatsApp Image 2024-02-19 at 10.12.04_1bc978c5.jpg
    643.4 KB · Views: 25
Last edited by FXDX,
  • Like
Reactions: sean222

Hassal

Well-Known Member
Member
Joined
Apr 22, 2023
Messages
568
Trophies
0
Age
24
XP
516
Country
United Arab Emirates
The ''kamikaze'' OLED method by which you expose the DATO alternative point, drilling up to the third layer in the board exactly as you can see in the picture, although it is very risky for an unskilled person, requiring special skills and tools, it is much easier to solder wire to that alternative point than to give down eMMC and then reball or put a DATO adapter. I personally prefer this alternative method.
Post automatically merged:
I was criticizing your approach using the back mosfet when all your wiring is done in front.
 
  • Like
Reactions: FXDX

FXDX

Well-Known Member
OP
Member
Joined
Sep 15, 2019
Messages
325
Trophies
0
XP
2,006
Country
Dominican Republic
I was criticizing your approach using the back mosfet when all your wiring is done in front.
Before, I always put the mosfet on the back and it worked perfectly every time, but recently I started putting the mosfet Flex Cable For Core Or SX Core Chip, on the Tegra. This way, I don't have to remove the board from the console anymore.
 

Attachments

  • flex.jpg
    flex.jpg
    19.1 KB · Views: 36

dgm_mixtoon

Member
Newcomer
Joined
Dec 20, 2020
Messages
14
Trophies
0
Age
31
XP
132
Country
Dominican Republic
Picofly Tiny mod to switch Oled, with "Facelift" (copper pad) DATO point, using the Kamikaze method!.
The tool used for drilling is MaAnt D1
I put the mosfet on the back of the motherboard.
I also used a copper pad for the DATO point.
I also put the SDA and SCL wires for a more stable glitch.
Everything went well without any particular problems.
You just need to be careful and be sure of your hand.
What Dremel model do you use to achieve a clean hole?
 
  • Like
Reactions: FXDX

Hassal

Well-Known Member
Member
Joined
Apr 22, 2023
Messages
568
Trophies
0
Age
24
XP
516
Country
United Arab Emirates
What about using sanding stick with fine grit? Would be impossible to dig through the wanted layer.
 
  • Like
Reactions: FXDX

Site & Scene News

Popular threads in this forum

General chit-chat
Help Users
  • S @ salazarcosplay:
    or have it that you don't know you are a cyborg, robot, and you find out and have a existential crisis
  • S @ salazarcosplay:
    or have it start in the virtual world and you are an ai that gained sentience
  • Xdqwerty @ Xdqwerty:
    btw gonna wash my face in a bit, my eyes feel tired
  • S @ salazarcosplay:
    and you convince your owner to help you break out of the virtual world to real world
  • BigOnYa @ BigOnYa:
    Eyes - "yawn"
    +1
  • S @ salazarcosplay:
    you bleack in to goverment computer systems to get cyborg schematics so you can get a robot body constructed
  • Xdqwerty @ Xdqwerty:
    btw @BigOnYa the health bar doesnt decrease when i take damage (and yes i put the "at the beggining of the scene change value of greenflatbar: set to Protagonistcopmode.Health::Health())
  • S @ salazarcosplay:
    i the protagonist
  • S @ salazarcosplay:
    human, robot, cyborg
  • S @ salazarcosplay:
    human with cyborg enhancements
  • S @ salazarcosplay:
    or like terminatior
  • S @ salazarcosplay:
    with living tissue
  • BigOnYa @ BigOnYa:
    @Xdqwerty there is health behaviour you can add to your character, then to use a health bar is lil more complicated, google n watch a few tutorial video on it, be too hard to explain here.
  • Xdqwerty @ Xdqwerty:
    @BigOnYa, the character has the health behavior
  • BigOnYa @ BigOnYa:
    I know you have to create a health and health max variable. Then there is a calculation you use in code to subtract width size of the health bar. Google few vids.
  • Xdqwerty @ Xdqwerty:
    @BigOnYa, the "greenflatbar" is one of the preset health bars btw
  • BigOnYa @ BigOnYa:
    Yea you can use any bar/sprite. It will just change the width. Ok good luck and have fun. I'm off to go shoot some pool at the bar. Talk to you later.
    +1
  • Xdqwerty @ Xdqwerty:
    @BigOnYa, why does the health behavior exist if you can just use a variable?
  • Xdqwerty @ Xdqwerty:
    and nope the number still doesnt change
  • Xdqwerty @ Xdqwerty:
    ok im gonna make my own asset
  • Xdqwerty @ Xdqwerty:
    nvm i think i fixed it
  • Xdqwerty @ Xdqwerty:
    @BigOnYa, I fixed it
    Xdqwerty @ Xdqwerty: https://www.youtube.com/watch?v=EkjpCNa6vlY