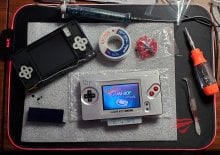
This ended up taking me three hours of total build time. I took my time, followed along with Macho Nacho Productions assembly video, and everything went fluid. My only snag was my shell didn't come with the 3D printed pieces that his did to support the screen, but it doesn't seem to affect my build at all. I tried to make it look as DMG as possible. The resistor soldering was MUCH easier thanks to my new, smaller soldering iron. It's USB powered and I got it with my Funnyplaying order from yesterday. It heats up in 10 seconds and cools off in about 30 seconds. Well worth the $10!
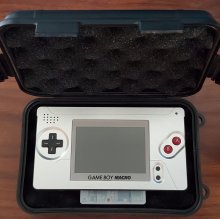
This is using an aftermarket screen sold by Handheld Legend, and I'm glad I did research first. Apparently the original bottom screens come with insulation on the back, and the replacement screens don't. So many of the reviews of this screen on eBay was people not putting Kapton tape on it and blowing their fuses. So I not only taped the back of mine properly, but also added some thin foam behind it for support. Works flawlessly. My original screens were turning yellow and the top screen had some weird diagonal likes that I assume is some kind of screen rot. So that's why I put a new screen in. Looks premium!
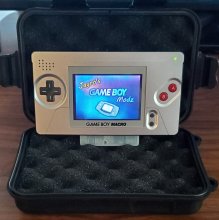
I used the original volume slider, start and select buttons, and Dpad. The aftermarket black D-pad that I bought was too thin, and the left side kept getting stuck, which simply will not do, so I used the stock Dpad. I also ended up cleaning the insides of the lower shell because..... Yuck.
All in all, I expected this to be much harder than it was, and the end result is incredible. I expected the aluminum to weigh it down, but it's surprisingly light and fells good in the hands.
View attachment 254370
View attachment 254368
View attachment 254366
This is using an aftermarket screen sold by Handheld Legend, and I'm glad I did research first. Apparently the original bottom screens come with insulation on the back, and the replacement screens don't. So many of the reviews of this screen on eBay was people not putting Kapton tape on it and blowing their fuses. So I not only taped the back of mine properly, but also added some thin foam behind it for support. Works flawlessly. My original screens were turning yellow and the top screen had some weird diagonal likes that I assume is some kind of screen rot. So that's why I put a new screen in. Looks premium!
I used the original volume slider, start and select buttons, and Dpad. The aftermarket black D-pad that I bought was too thin, and the left side kept getting stuck, which simply will not do, so I used the stock Dpad. I also ended up cleaning the insides of the lower shell because..... Yuck.
All in all, I expected this to be much harder than it was, and the end result is incredible. I expected the aluminum to weigh it down, but it's surprisingly light and fells good in the hands.
View attachment 254370
View attachment 254368
View attachment 254366