Tutorial  Updated

How to flash the HWFLY Clone chips

See below for updates.

IF YOU BREAK YOUR BOOT0 PIN. DO NOT DM ME ASKING FOR HELP. THAT'S IT. YOU BREAK THAT PIN AND YOU CANT FLASH. YOUR CHIP IS STUCK WITH WHATEVER HWFLY PUT ON IT


Pre-requisites:


  • Raspberry Pi Zero W
    • You may use another flasher if you desire.
  • Pinout Diagram
  • Modchip Diagram
  • FULL_CHIP_STOCK.bin
  • Modchip Diagram, find the PA9(TX) and the PA10(RX) pins on your modchip, and do the following:
    • Connect GPIO14(TX) on your Raspberry Pi Zero W to the PA10(RX) pin on your modchip.
    • Connect GPIO15(RX) on your Raspberry Pi Zero W to the PA9(TX) pin on your modchip.

  1. Solder a wire to each of the following pinouts on the Raspberry Pi Zero W:
    • 3.3V
    • Ground
    • GPIO 14 (UART TX)
    • GPIO 15 (UART RX)
  2. Do the following to prepare the modchip:
    1. Lift pin 44 (also known as BOOT0).
    2. You will need a way to power the chip, so you need to find two 3.3v points. It can be on a MOSFET, but it will differ based on the revision of the modchip.
    3. Connect Ground on your Raspberry Pi Zero W to the Ground pin on your modchip.
    4. Check the Modchip Diagram, find the PA9(TX) and the PA10(RX) pins on your modchip, and do the following:
      • Connect GPIO14(TX) on your Raspberry Pi Zero W to the PA10(RX) pin on your modchip.
      • Connect GPIO15(RX) on your Raspberry Pi Zero W to the PA9(TX) pin on your modchip.
  3. Boot your Raspberry Pi Zero W and do the following:
    1. In the terminal, type the following command, and press enter:
      Bash:
      sudo nano /boot/config.txt
    2. Add the following line to the end of the file:
      INI:
      dtoverlay=pi3-miniuart-bt
    3. Press CTRL + X to save and exit the editor.
    4. In the terminal, type the following command, and press enter:
      Bash:
      sudo nano /boot/cmdline.txt
    5. Remove the following line from the file:
      INI:
      console=serial0,115200
    6. Press CTRL + X to save and exit the editor.
    7. Restart your Raspberry Pi with this command
      Bash:
      sudo /sbin/reboot
    8. In the terminal, type the following commands, and press enter after each command:

      Bash:
      git clone https://github.com/Pheeeeenom/stm32flash.git
      cd stm32flash
      sudo make install
  4. Now you will flash the modchip.
    Note: This will remove read protection, and the modchip will wipe itself (that is what we want).
    1. In the terminal, type the following command, and press enter:
      Bash:
      stm32flash -k /dev/serial0
    2. Now to flash Spacecraft-NX Version 0.2.0, type the following, and press enter:
      Bash:
      stm32flash -v -w ./FULL_CHIP_STOCK.bin /dev/serial0
  5. Once you're done flashing your modchip, remove the wiring from the modchip, and restore the 3.3v pin on the modchip to its original position.

Please post pictures of your work here to further the identification of the different board revisions!


UPDATE: So it seems like stitching the spacecraft bootloader and firmware together from the repo causes unstable glitching behaviors. For now, consistent glitching behavior works with this bootload/firmware combo.
This is the original file on the OLED variant chip which has 0.2.0 spacecraft. As for glitching, I'll figure it out, give me some time...unless someone else wants to hop in and reverse the differences.

For now, this at least solves the 0.1.0 HWFLY gen 3 issue. More to come.

UPDATE 2: This is only going to work on some HWFLY chips. Older ones use higher protection than the new revisions that seem to use the QFN FPGA.

UPDATE 3: This should fully work on OLED modchips with the QFN FPGA. https://github.com/Pheeeeenom/firmware
 
Last edited by Mena,

Vladjaye

Well-Known Member
Newcomer
Joined
Jan 11, 2021
Messages
48
Trophies
0
Age
28
XP
379
Country
United States

doom95

Well-Known Member
Member
Joined
Aug 12, 2019
Messages
303
Trophies
0
Age
24
XP
785
Country
Netherlands
Yes. But included 0.5.0 is improved in several regards, and is the only one providing additional toolbox functionality. It has all 0.4.0 improvements and more.
 

Attachments

  • 20220214_011133.jpg
    20220214_011133.jpg
    1.3 MB · Views: 125
  • 20220214_185100.jpg
    20220214_185100.jpg
    1.2 MB · Views: 130
  • 20220214_203228.jpg
    20220214_203228.jpg
    1.3 MB · Views: 108
  • 20220214_230440.jpg
    20220214_230440.jpg
    1.4 MB · Views: 127

Dean_

Well-Known Member
Member
Joined
Sep 11, 2014
Messages
684
Trophies
0
XP
712
Country

Vladjaye

Well-Known Member
Newcomer
Joined
Jan 11, 2021
Messages
48
Trophies
0
Age
28
XP
379
Country
United States
Yes. But included 0.5.0 is improved in several regards, and is the only one providing additional toolbox functionality. It has all 0.4.0 improvements and more.
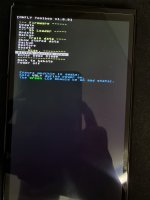
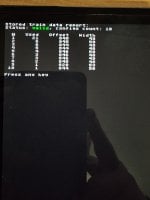
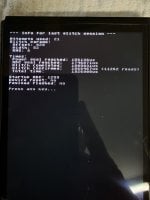
Amazing! Would love to see more details about the toolbox functionality. What is deep sleep mode? Do we have to manually restore\reset training data after flashing?
Also, the git instructions have this: reboot while holding VOL+ (verify: modchip green light stays on)
How we start reboot process? Press and hold power while holding vol+?
 

doom95

Well-Known Member
Member
Joined
Aug 12, 2019
Messages
303
Trophies
0
Age
24
XP
785
Country
Netherlands
Amazing! Would love to see more details about the toolbox functionality. What is deep sleep mode? Do we have to manually restore\reset training data after flashing?
Also, the git instructions have this: reboot while holding VOL+ (verify: modchip green light stays on)
How we start reboot process? Press and hold power while holding vol+?
After glitch normally modchip goes to deep sleep. Holding vol+ causes it to stay awake so it can take commands from toolbox.
Reboot simply by power off from menu, then use power button.
No need to store/recover training data.
 

Vladjaye

Well-Known Member
Newcomer
Joined
Jan 11, 2021
Messages
48
Trophies
0
Age
28
XP
379
Country
United States
After glitch normally modchip goes to deep sleep. Holding vol+ causes it to stay awake so it can take commands from toolbox.
Reboot simply by power off from menu, then use power button.
No need to store/recover training data.
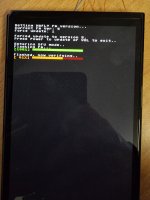
Successfully flashed it, thanks! I'm used to the repeated training session after firmware flashing through USB. This time there was no training session. Is it normal? Do I have to reset it if one of the boot processes took 4-5 blinking purple leds? I do get a new NO SD (Hekate) screen though.
 

doom95

Well-Known Member
Member
Joined
Aug 12, 2019
Messages
303
Trophies
0
Age
24
XP
785
Country
Netherlands
Training params are for the FPGA. Firmware changes cannot influence success rate of existing parameters, so retraining is not needed. If you want retraining, use 'reset traindata' from toolbox.
New Loader (which shows NO SD screen) is much faster, works regardless of RAM type, works with all SD cards, and is required for toolbox.
 
  • Like
Reactions: Vladjaye

Vladjaye

Well-Known Member
Newcomer
Joined
Jan 11, 2021
Messages
48
Trophies
0
Age
28
XP
379
Country
United States
Training params are for the FPGA. Firmware changes cannot influence success rate of existing parameters, so retraining is not needed. If you want retraining, use 'reset traindata' from toolbox.
New Loader (which shows NO SD screen) is much faster, works regardless of RAM type, works with all SD cards, and is required for toolbox.
I see, but just for a reference - do we have to remove SD card before using reset traindata in the toolbox? Thanks!
 

urherenow

Well-Known Member
Member
Joined
Mar 8, 2009
Messages
4,787
Trophies
2
Age
48
Location
Japan
XP
3,687
Country
United States
2. run hwfly_toolbox from hekate

^This is actually confusing. You mean NYX, right? Then again, it's also confusing hearing people say they've upgraded with these instructions, when 0.5.0 is the latest, and 0.5.0 is required for the toolbox to work :unsure: :wacko:
 

Dean_

Well-Known Member
Member
Joined
Sep 11, 2014
Messages
684
Trophies
0
XP
712
Country
2. run hwfly_toolbox from hekate

^This is actually confusing. You mean NYX, right? Then again, it's also confusing hearing people say they've upgraded with these instructions, when 0.5.0 is the latest, and 0.5.0 is required for the toolbox to work :unsure: :wacko:
You can use toolbox without flashing 0.5.0, but it has limited function.
 

urherenow

Well-Known Member
Member
Joined
Mar 8, 2009
Messages
4,787
Trophies
2
Age
48
Location
Japan
XP
3,687
Country
United States
wait, ok, I get it. The sdloader.enc does... something... and allows the vol+ to keep the mod chip active, so that it can then flash the bootloader and firmware, right? And am I to understand that this is compatible with this chip?
 

Attachments

  • OLED-DIAGRAM-CHIP-OLED.jpg
    6.7 MB · Views: 128
  • Like
Reactions: doom95

Vladjaye

Well-Known Member
Newcomer
Joined
Jan 11, 2021
Messages
48
Trophies
0
Age
28
XP
379
Country
United States
wait, ok, I get it. The sdloader.enc does... something... and allows the vol+ to keep the mod chip active, so that it can then flash the bootloader and firmware, right? And am I to understand that this is compatible with this chip?
Yes, it is for this chip. Sdloader.enc replaces the white NO SD screen with the black one that shows even on Micron memory Switch consoles
 
  • Like
Reactions: urherenow

FR0ZN

Well-Known Member
Member
Joined
Nov 2, 2013
Messages
1,385
Trophies
1
Age
37
XP
3,885
Country
United States
Oh boy, so we now have 3 firmwares for this chip? :D

1) from whoever made r021/r022
2) Menas 0.4.0
3) And now this 0.5.0

Correct? :wacko:
 

Vladjaye

Well-Known Member
Newcomer
Joined
Jan 11, 2021
Messages
48
Trophies
0
Age
28
XP
379
Country
United States
I believe that the r21 and r22 are from the same source as whatever the firmware that comes with chip originally. The 0.5.0 I believe is Menas based. Just my assumptions.
 
  • Like
Reactions: FR0ZN

Site & Scene News

Popular threads in this forum

General chit-chat
Help Users
    Psionic Roshambo @ Psionic Roshambo: https://www.youtube.com/watch?v=COua5q4CByg